

How to Print a Batch of Invoices in Quickbooks
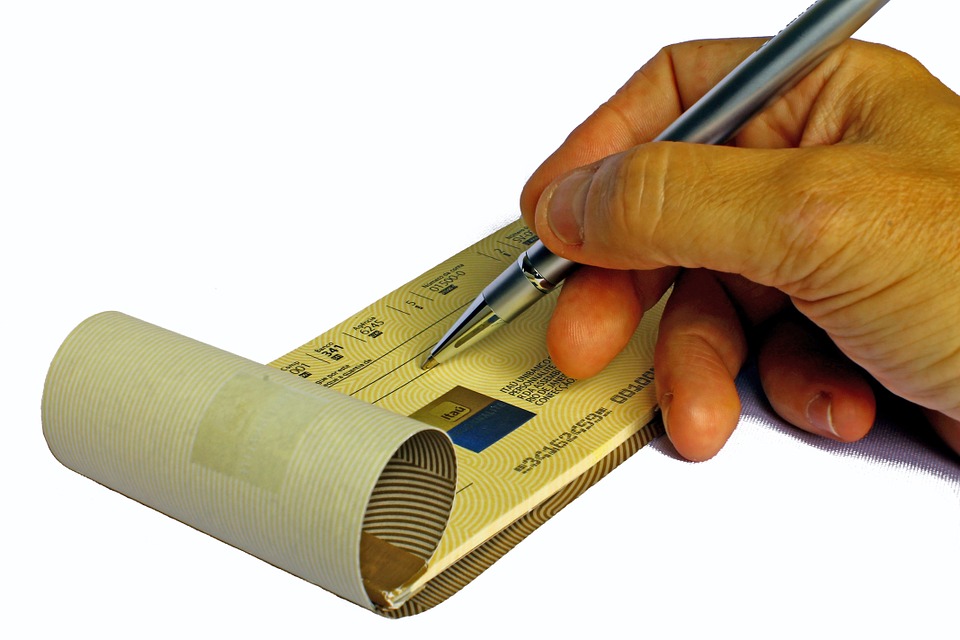
 Invoices are an important tool when running a business. If you perform a service that allows customers or clients to pay after the service has been performed, you’ll need to invoice them for the cost of that service. Assuming you use the Quickbooks accounting software, you can easily create and print invoices on the fly. But what if you need to create multiple invoices at the same time?
Before we reveal the steps to creating a batch of invoices, let’s first go over the basics of an invoice. An invoice is essentially an itemized bill of the goods or services provided by a business owner to a customer or client. It contains the specific product or service purchased, as well as the respective cost of those products and services and the terms of payment. Not all businesses need or use invoices. However, those that provide services in advance — or sell products while allowing customers to pay after the fact — typically need them.
So, how do you print invoices in bath using Quickbooks? To do this, you’ll need to log in to your Quickbooks account and from the home screen, click the blue navigation bar on the left-hand side, followed by “Transaction.” From the “Transactions” tab, choose Sales > filter > Invoices, at which point you can choose the preferred “Status” for your invoices (e.g. “All Statuses”).
Next, you’ll need to select the dates for the invoices, followed by “All” for “Customer.” When you are finished, click “Apply” to apply the changes to your invoices. You can then click “Batch actions” to prepare the batch invoices for printing. Once selected, click “Print Transactions,” after which the invoices will begin loading in PDF format — this is the de-facto standard format for invoices created and printed in Quickbooks. You can then hover your mouse cursor on the bottom-right corner of the invoices and click the “Print” icon. You should see a new window appear with printing options, such as print in grayscale or color. Double-check to ensure the settings are correct and proceed to print. Sorry if you were expecting more, but that’s all it takes to print batch invoices in Quickbooks!
As you can see, printing batch invoices in Quickbooks is a quick and easy process. While it takes a few additional steps than simply printing a single invoice, any business owner or accountant should be able to complete this task in just a few minutes by following steps outlined here.
Did this tutorial work for you? Let us know in the comments section below!

How to View Retained Earnings in Quickbooks
 Are you trying to view the retained earnings of a balance sheet in Quickbooks? Well, you probably won’t find this information listed on any report. This is because the transition happens on the back end of Quickbooks. So, unless you made other entries to the Retained Earnings account, it won’t show when you access the account.
The good news is that you still view the details of a Retained Earnings account in Quickbooks. To do so, you’ll need to run a customized Profit and Loss report, after which you can focus on the New Income number. For a step-by-step guide on how to view a Retained Earnings account in Quickbooks, keep reading.
Before we begin, it’s important to note that Quickbooks doesn’t allow you to click on retained earnings from the respective balance sheet. This is because the Retained Earnings account is essentially a rollover from the previous years’ net profit. In Quickbooks Online, it will swap the funds from your income automatically, without recording the transaction.
To view the details of a Retained Earnings account, you’ll need to run a Profit and Loss statement from the previous year, which will reveal the Retained Earnings account number. So, log in to your Quickbooks Online account and choose Reports > Go to report > Profit and Loss. From here, choose the Profit and Loss report, after which you can set the date to “All Dates” for the “Transaction Date” and then click “Run Report.” Finally, click “Net Income” to see a report of all transactions that fall under this criteria.
Intuit also recommends viewing the Profit and Loss report by year to see the details of a Retained Earnings account. Basically, this allows you to see the amount from the profit and loss transferred into your Retained Earnings account. To perform this operation, click Reports > Go to report > Profit and Loss > Customize > Rows/Columns > Fiscal Years or Calendar Years > Run Report.
Once you’ve run the report, check to see if the number listed is the same as your Returned Earnings number. If the number is different, only transactions that affect your balance sheet will be entered. You can see user-generated transactions by clicking the Gear icon > Chart of Accounts > Retained Earnings > Run Report > set Transaction Date to “All Dates” and then click “Run Report.”
Did this tutorial work for you? Let us know in the comments section below!

How to Record Credit Card Payments in Quickbooks
 Quickbooks supports several methods for recording payments made to a credit card. These methods generally include writing a check, transfer, or using the Bill/Pay Bills feature. So, the next time you make a payment on one of your business’s credit card, consider the following options to record the payment in transaction.
Write a Check
Arguably, one of the easiest ways to record a credit card payment in Quickbooks is to write a check. Assuming you use Quickbooks Online, you can do this by logging in to your account and choosing the plus icon (+), followed by “Check.” For the “Bank Account” field, click the drop-down arrow and select the bank account from which you are making the payment. For payments made via Electronic Funds Transfer, enter “EFT” in the “Check #” field. In the “Pay to the Order of” field,” enter the name of your credit card. You can then choose the appropriate credit card in the “Accounts” field, after which you can click save to record the payment and subsequently lower the balance on your credit card.
Create a Transfer
Another way you can record payments made to credit cards in Quickbooks is to create a transfer. This is done by logging in to your account and choosing the plus icon (+), followed by “Transfer.” In the “Transfer Funds From” drop down menu, choose the bank account from which the credit card payment was made. You should then choose the credit card to which the payment was made in the “Transfer Funds To” field.” And in the “Transfer Amount” field, enter the dollar amount of the payment. Although optional, you may also want to enter a date and memo for the transfer. When you are finished, click “Save” to complete the changes and record the payment.
Make a Payment During Reconciliation
According to Intuit, a third method for recording credit card payments is to make a payment during reconciliation. After reconciling your credit card account, you’ll have the option to either make a payment, enter a bill to pay at a later time, or leave the balance unchanged. Basically, you can record payments by clicking the gear icon next to your company name, followed by “Reconcile.” Choose the credit card account to which the payment was made, after which you should complete the “Reconcile Statement” window. You’ll then be presented with a “reconcile” window, where you can click the box next to the transactions that match the transactions on your statement — just like any other reconciliation. Hopefully, both amounts will equal zero, in which case you can click “Finished” to close the window and save your changes.
Did this tutorial work for you? Let us know in the comments section below!

How to Give Discounts on Invoices
 There are numerous reasons why businesses give discounts to their customers. Whether you’re selling a product or service (or both), a discount can encourage prospects to take immediate action instead of waiting. It triggers the “fear of missing out” (FOMO), as prospects want to take advantage of the deal. In other cases, a business owner may offer discounts to customers who’ve experienced problems in the past, such as long shipping times. Regardless of your reason for giving discounts, you might be wondering how to create discounts in Quickbooks. For a step-by-step process on how to make discounts in Quickbooks, keep reading.
Discounts in Quickbooks are created as line items. To do this, log in to your Quickbooks account and create a product or service item that uses the Discounts income account. You can give customers either a percentage discount or a static, fixed discount by accessing the Gear Icon > Company settings > Sale > Discounts.
Next, you’ll need to create the product service item by accessing the Gear Icon > Products and Services List > New (top right corner). From here, enter “Discount” in the “Name” field for a fixed discount. You can also offer multiple discount percentages by entering “Discount [%].” For the “Rate” field, enter a negative percentage that correlates with the discount. If you want to give a 5% discount, for instance, enter “-5%.” In the Account drop-down menu, select “Discounts income account,” after which you should double-check to make sure “Is Taxable” is not checked. If it is checked, click it once more to uncheck it. When you are finished, click save to complete the changes.
Now that you’ve created the product service item discount, it’s time to use it. This is done by accessing the Plus Sign Icon > Invoice or Sales Receipt > Customer. Here, you can enter the items that you want to be discounted. Next, select the Discount product or service item that you recently created. Now, if you only want to include discounted items on the invoice, you’ll need to enter the invoice subtotal amount in the field titled “Quantity.” This will automatically calculate the discount, displaying it as a negative amount. You can then select to add a subtotal to your invoice by clicking the “Add subtotal” option. Last but not least, enter any further items, and then click “Save.” Congratulations, you’ve just created a discount!
Did this tutorial work for you? Let us know in the comments section below!

How to Fix Reconciliation Discrepancies in Quickbooks
 Reconciliation is an important step in small business accounting. It involving comparing the transactions listed in your books with those in listed in your bank accounts. The general idea is to ensure that the two are the same. If your books show one total and your bank accounts show a different total, you know there’s a discrepancy somewhere. So, how do you fix discrepancies identified from reconciliation in Quickbooks?
Run a Reconciliation Discrepancy Report
You should first run a reconciliation discrepancy report, which reveals all transactions that have been changed since the last time you reconciled them, sorted by statement date. To run this report, log in to your Quickbooks account and select Reports > Banking > Reconciliation Discrepancy. Next, choose your account and select “OK.” You can then review the reconciliation discrepancy report to see what’s missing.
Run a Missing Checks Report
Intuit also recommends running a missing checks report to help identify and fix discrepancies. This is also access within the Reports > Banking menu. Instead of choosing “Reconciliation Discrepancy,” however, you’ll need to select “Missing Checks.” After selecting “Missing Checks,” choose your account and select “OK.” You can then review the report while searching for transactions that don’t match those listed on your bank statement.
Run a Transaction Detail Report
A third report that you should run is a transaction detail report. This is found under Reports > Custom Reports > Transaction Detail. Once you’ve accessed this area, click the “Display” tab and choose either “Date From” or “Date To.” You can also filter the results based on account, last modified, date date from, or date to. Select “OK” to run the report with the settings you just made.
Fixing Discrepancies
By running a reconciliation discrepancy report, a missing checks report, and a transaction detail report, you should be able to identify the problematic transaction or transactions that don’t match your bank statement. This is relatively straight-forward, as it involves modifying the transaction or transactions in your books to match your bank statement.
Reconciliation is arguably one of the most important steps in small business accounting. However, you’ll still need to fix any discrepancies that you find. As noted above, this is typically achieved by modifying the respective transaction or transaction. Once you’ve made the changes, run the three reports again to ensure your books and bank accounts match.
Did this tutorial work for you? Let us know in the comments section below!

Everything You Need to Know About Journal Entries in Quickbooks
 Quickbooks supports the use of “journal entries” to capture special transactions. These journal entries are commonly used for items such as deferred revenue, work in progress, etc. Unfortunately, many newcomers feel lost and confused regarding this feature. How do you create journal entries? Where are they stored? To learn more about journal entries in Quickbooks, keep reading.
Journal entries can be used for a wide variety of purposes in Quickbooks. For instance, you can use them to enter transactions in the system of accounting using debits or credits in a ledger, or you can use them to transfer funds from one income or expense to the other. Furthermore, journal entries can be used to transfer funds from an asset, liability or equity to an income or expense account. And they can even be used to enter miscellaneous transactions for year-end activities.
To enter a journal entry in Quickbooks Desktop, follow the steps listed below:
- Log into your Quickbooks Desktop account.
- Choose “Make General Journal Entries” on the main menu.
- In the “Make General Journal Entries” field, enter the appropriate date.
- Quickbooks should create a journal entry number automatically. If it does not, enter a number manually.
- Enter the details of the journal entry, including the debit or credit amount, whether it’s a customer, vendor or employee, etc.
- Although optional, you can assign a class to the amount if you wish.
- When you are finished, click “Save & Close” to save the changes and complete the journal entry.
To enter a journal entry in Quickbooks Online, follow the steps listed below:
- Log into your Quickbooks Online account.
- Click the + icon at the top of the screen.
- Choose “Journal Entry.”
- Enter a date for the journal entry.
- Enter a journal number for the entry (make a note of this number for reference purposes later).
- Enter Debit or Credit amount.
- Enter a description (also used for future reference purposes).
- Double-check the information to ensure it’s correct, and slick “Save.”
Hopefully, this gives you a better understanding of journal entries in Quickbooks and how they work. While there’s no rule requiring business owners and accountants to use them, journal entries are a useful tool that can help keep your books in order.
Did this tutorial work for you? Let us know in the comments section below!
How to Email Pay Stubs in Quickbooks Desktop
 Want to email pay stubs to your employees using Quickbooks Desktop? Well, you can by following the steps listed below. We’re going to walk you through the steps to emailing pay stubs from Intuit’s popular accounting software Quickbooks Desktop.
Before we begin, it’s important to note that pay stubs created in Quickbooks use the PDF format. This is beneficial for several reasons: first, it preserves the look and content of the pay stub. Secondly, it allows business owners and accountants to password protect their pay stubs, ensuring that only the intended recipient (the employee) can access them. When the employee receives his or her pay stub, they can save and print it from a computer, after which it can be cashed or deposited into the employee’s bank account.
When you are ready to email a pay stub, log into your Quickbooks account in single-user mode (not multi-user). Next, access File > Print Forms > Pay Stubs. From here, double-check to ensure the account listed in the “Bank Account” field is correct. If it’s not, click the drop-down arrow and choose the correct account from which you want to make the payment. You can then check the “from” and “through” dates, also ensuring are correct.
Next, select each employee to whom you want to an email a pay stub. You can click the “Preview” button to see how the pay stubs looks before sending. Assuming it looks good and contains the correct information, click the “Email” button.
There are still a few other steps you’ll need to take before emailing the pay stub, one of which is making a note of each employees’ password. Every employee to whom you email a pay stub will be given a unique password, which is needed to open and access the pay stub on their end. After making a note of the employees’ passwords, click “OK.” Now, enter the email addresses of the employees and click “OK” again. Quickbooks will ask you to confirm the information, after which you can click “Send Now.” Your pay stubs will now be sent to the employee or employees listed.
If you want to see list of all emails to sent to employees, access the “Employee Center,” followed by “Employee Information” and “Sent Email.”
Did this tutorial work for you? Let us know in the comments section below!

How to Handle an Overpayment in Quickbooks
 There are times when a customer or client may accidentally overpay for a business’s product or service. Of course, it’s proper etiquette to refund the customer or client for the difference of their overpayment. Furthermore, you’ll need to include this transaction in Quickbooks. So, how do you handle an overpayment such as this in Intuit’s accounting software? For a step-by-step walkthrough on how to handle overpayments in Quickbooks, keep reading.
Assuming a customer or client has overpaid you, you’ll need to create a memo first, after which you can issue a refund check. If you haven’t done so already, go ahead and create a credit memo to use for the refund. Next, open the credit memo and click the “Refund” link at the top of the window. Go through the data here to ensure all information is correct. With that said, however, you should leave “Accounts Receivable” as the account listed in the details of the refund check. Doing so allows Quickbooks to credit and refund the correct customer. When you are finished, click “OK” to save the changes.
You aren’t out of the woods just yet. After creating the credit memo, you need to connect it to the check; otherwise, Quickbooks won’t track the transaction correctly. To connect your credit memo and the check, access Customers > Receive Payments. From here, you can choose the customer to whom you are making the refund. This should bring up the amount of the credit in the field titled “Existing Credits.” Double-check to make sure it’s correct and choose “Apply Existing Credits.”
Next, you’ll see a “Refund Chk” field, in which you should enter the check amount in the “Payment” column (if it’s not already listed). Click “OK” to proceed. Attempting to access Customers > Credit Credit Memos/Refunds should now reveal the credit memo you just created. Click “Tx History” to see the refund check in the Transaction History-Credit window. Congratulations, you’ve just handled an overpayment in Quickbooks!
Even if you follow the steps listed above, however, you should still notify the customer or client about his or her overpayment. Contact the individual to inform them of their overpayment, and also let the individual know that you are preparing to refund the difference of the overpayment.
Did this tutorial work for you? Let us know in the comments section below!

How to Adjust Inventory in Quickbooks
 Small business owners must carefully manage their inventory to keep their books in order. When a customer buys a product, you must remove a unit of that product from your inventory. Assuming you use Intuit’s Quickbooks accounting software, you can easily keep track of your inventory. But what if you need to adjust the quantity of your inventory?
If you need to adjust an inventory quantity without recording a sale transaction, you can do so using Quickbooks by performing the following steps.
First, log into your Quickbooks account as the administrator and choose the Plus (+) icon, followed by “Inventory Quantity Adjustments.” Next, enter the adjustment date, which is essentially the date you wish to adjust. You can then enter the Inventory Adjustment Account and select a product. Keep in mind that Quickbooks will automatically pre-populate both the description and current quantity of the inventory. However, you can enter your own custom description in the “Description” field. This is completely optional, though, and will not affect the adjustment of your inventory.
After completing the aforementioned steps, enter a new quantity for the inventory in the filed labeled “QTY.” You’ll also see an option to enter additional products. When you are finished, click “Save” to finish the process and save your changes. Sorry if you were expecting more, but that’s all it takes to adjust inventory using Quickbooks! Upon completing the steps, Quickbooks will record the adjustments to your stock Asset and Cost of Goods Sold, which you can find under stock Shrinkage.
Of course, you can also delete or edit an inventory adjustment. To edit or delete an inventory adjustment, log into your Quickbooks account and choose the Find (+) button, followed by “Advanced search.” From here, select “All Transactions,” at which point you should see a drop-down menu appear. Scroll through the drop-down menu and choose “Inventory Quantity Adjustment,” followed by ‘Search.” Go through your list of inventory adjustments, and once you’ve found the one you wish to modify, choose either “Edit” or “Delete,” depending on the action you wish to perform.
Editing or deleting an adjustment inventory is relatively simple. You either delete the inventory adjustment or modify it, after which you can click “Save” to complete the change.
Did this tutorial work for you? Let us know in the comments section below!

How to Edit a Payment that is Already Deposited
 Here’s a scenario to consider: you’re a business owner who recently received a payment from a customer. You enter the payment into Quickbooks, only to realize later that you entered the wrong amount. As you may already know, payments and sales receipts cannot be edited in Quickbooks. So, how are you supposed to correct this mistake?
To fix an erroneous payment such as this, you’ll need to remove it from the deposit temporarily, after which you can edit it to the correct amount and add it back to the original deposit.
When you are ready to begin, log into your Quickbooks account and choose the Gear icon > Chart of Accounts/Account and Settings. From here, select “View Register/Account History” for the account to which the payment was made. Next, scroll through and locate the deposit with the erroneous payment listed and check to see whether it has an “R” in the “Reconcile” box. Now click the deposit in the register, followed by “Edit” to open the deposit. This will bring up a new menu for the Deposits. You should then click the payment to remove the check mark and remove the payment from the deposit. When you are finished, click “Save,” followed by “Yes” when Quickbooks asks if you are sure you want to modify.
You aren’t out of the woods just yet. You should now edit the payment by clicking the deposit (found on the register screen). Next, choose the “Name” on the payment you just unchecked to access the “Receive Payment” screen, where you can enter the correct amount. When you are finished, click “Save.”
With the payment corrected, you can replace it with the old payment. Go back to the deposit and click box to the left side of the “Payment” column. This should add the check mark and the appropriate amount to the deposit. Click “Save” and you are done! Congratulations, you’ve just edited a payment in Quickbooks that was already deposited.
Of course, it’s a good idea to reconcile your account after making any major changes such as this. Doing so is a quick and easy process that can reveal problems associated with this or other transactions. Reconciliation is a regular part of accounting that every business owner and professional accountant should do, regardless of whether or not you are editing a payment that is already deposited.
Did this tutorial work for you? Let us know in the comments section below!