
Real Estate Businesses: Tips on Getting Approved for a New Mortgage
 Do you own a real estate business? If so, you probably know the importance of securing mortgages. Mortgages are loans used to purchase property. Whether you’re a real estate developer or investor, you’ll need mortgages to purchase properties. Here are several tips on how to get approved for a new mortgage.
#1) Enhance Your Credit Score
While it may sound obvious, it’s worth emphasizing the importance of your FICO credit score in your mortgage application. Lenders closely scrutinize your credit history, considering factors such as your payment track record, any past delinquencies, your available credit, and, most critically, your FICO credit score. To increase your odds of mortgage approval, it’s advisable to obtain your credit report and take proactive measures to rectify any negative marks that could hinder your application.
#2) Choose the Right Mortgage Type
The type of mortgage you opt for can significantly influence your likelihood of approval. While some buyers may lean towards a 15-year mortgage, thinking it will allow them to pay off their property sooner and save on overall interest costs, lenders may have reservations about these loans due to their higher monthly payments. If you find yourself turned down for a 15-year mortgage, consider applying for a more conventional 30-year loan instead.
#3) Amplify Your Down Payment
Think about the amount you plan to put down as a down payment on your prospective property. A larger down payment can substantially boost your chances of loan approval. The reasoning here is straightforward: a sizable down payment translates to a smaller loan amount. This reduction in the loan amount diminishes the lender’s risk and enhances your likelihood of securing approval. While it doesn’t guarantee approval, a substantial down payment can be a persuasive factor in your favor.
#4) Delay New Credit Applications
It’s wise to refrain from opening any new lines of credit until after you’ve successfully secured your mortgage. Whether it’s a retail store credit card, an auto loan, a personal loan, or any other form of credit, it’s best to hold off until your mortgage is finalized. Why? Because new lines of credit have the potential to negatively impact your FICO credit score, raising the risk of a mortgage rejection.
Obtaining a new mortgage can be a complex process, but by giving careful attention to these essential factors, you can enhance your chances of successfully securing the financing needed to make your new property a reality. Remember, thorough preparation sets the stage for a smoother and more confident property-buying journey.
Have anything else that you’d like to share? Let us know in the comments section below!

5 Tips to Follow When Tracking Business Expenses
 Tracking expenses is an essential part of running a business. All businesses have expenses. Whether you operate a retail store, restaurant, computer repair shop, window cleaning or any other business, you’ll have to purchase goods and services to carry out your operations. Known as expenses, they will affect your business’s cash flow and tax liabilities. Below are five simple tips to follow when tracking business expenses.
#1) Use Business Accounts
You’ll have an easier time tracking business expenses if you use business accounts for purchases. Rather than using a personal credit card to purchase goods and services for your business, for instance, use a business credit card. Not only will this help you build business credit; it will separate your business expenses from your personal expenses.
#2) Create Expense Categories
For smoother expense tracking, create expense categories. Expense categories are exactly what they sound like: categories to which you can assign business expenses. You may want to create expense categories for payroll, equipment and office supplies, for example. Rather than placing all of your business expenses together, you can assign them to a relevant expense category.
#3) Maintain a Paper Trail
Maintaining a paper trail can prevent many common headaches associated with expense tracking. A paper trail is a set of records showing business expenses. When you purchase goods or services with a credit card, you’ll leave behind a paper trail. The paper trail will consist of monthly statements breaking down all of the purchases you made during that month. If you purchase goods or services with cash, on the other hand, you may not have a paper trail. The vendor may provide you with a paper receipt, but paper receipts often get lost or damaged. And without a receipt, you won’t have a paper trail showing the transaction.
#4) Reconcile Accounts
Another tip to follow when tracking business expenses is to reconcile accounts. Account reconciliation is the process of comparing transaction reports between two or more sources, such as accounting software and monthly statements. You want these sources to match. If there’s a discrepancy between your accounting software and monthly statements, you’ll need to go back and correct the problematic transaction or transactions.
#5) Plan for Deductions
Business expenses are tax deductible. If you purchase something that’s essential to your business’s operations, you can typically deduct it from your business’s taxes. But you’ll need to plan for these deductions accordingly. Familiarize yourself with common deductions for businesses in your industry, and keep records of all related transactions so that you can claim them as tax deductions.
Have anything else that you’d like to add? Let us know in the comments section below!

How to Set Preferences for Reports in QuickBooks
 You don’t have to manually customize reports in QuickBooks each time you generate them. The popular accounting software supports preferences for reports. When you set preferences for reports, QuickBooks will remember them. The next time you generate a report, QuickBooks will automatically apply these saved preferences. How do you set preferences for reports in QuickBooks exactly?
Access Preferences
To set preferences for reports in QuickBooks, you need to access this feature. Click the “Edit” menu in QuickBooks, followed by “Preferences.” Next, click the “Reports & Graphs” option on the left side of QuickBooks. You can then choose between “My Preferences” and “Company Preferences.”
My Preferences vs Company Preferences
Both “My Preferences” and “Company Preferences” allow you to set preferences for reports. The difference is that the former is specifically linked to your QuickBooks account, whereas the latter is linked to all user accounts.
If there are other user accounts with whom you collaborate on the company file, you may want to choose “Company Preferences.” If you are solely responsible for managing the company file, on the other hand, you may want to choose “My Preferences.” Regardless, selecting one of these two options will allow you to set preferences for reports in QuickBooks.
Breaking Down the Options
When you select “My Preferences” or “Company Preferences,” QuickBooks will display a set of customization options. You can use these options to specify your reporting preferences.
You can specify the refreshing frequency for preferences, for instance. Clicking “Reports and graphs preferences” will allow you to choose from manual references, automatic references or don’t refresh at all.
You can also customize the display of graphs. The default settings allow QuickBooks to display graphs in 3D. You can change this, however, so that QuickBooks displays graphs in 2D. 2D graphs aren’t as visually appealing, but they allow for a smaller file size by conserving data.
How to Revert to the Default Reporting Preferences
You can always revert back to the original reporting preferences. Maybe you aren’t happy with your own preferences, or perhaps QuickBooks isn’t displaying your preferences properly. If you want to revert to the default reporting preferences, click the “Edit” menu and choose “Preferences.” Go back to the “Reports & Graphs” option and choose “My Preferences” or “Company Preferences.” The revert option is available under “Header/Footer” and “Fonts & Numbers.”
Did this tutorial work for you? Let us know in the comments section below!
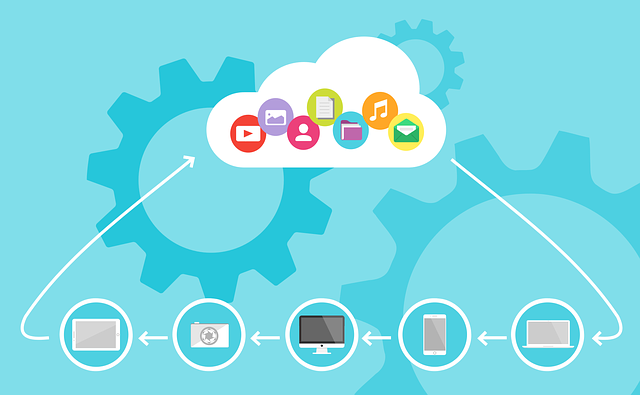
On-Premise vs Cloud Accounting Software: Understanding the Difference
 Accounting software is often categorized based on where it’s installed. Like most types of software, accounting software runs on a computer or machine. The location of this computer or machine, however, may vary. There’s on-premise accounting software, and there’s cloud accounting software. By understanding how they differ, you can choose the right type of accounting software for your business.
What Is On-Premise Accounting Software?
On-premise accounting software refers to the use of accounting software that’s installed on a local machine or computer. As a business owner, you probably have an office. Maybe you rent a commercial office space, or perhaps you work out of a home office. Installing accounting software on a computer in your office is considered on-premise accounting software. The accounting software is literally “on your business’s premises.”
What Is Cloud Accounting Software?
Cloud accounting software refers to the use of accounting software that’s installed remotely on the cloud. The cloud is a collection of computer hardware and software that’s available to access on the internet. Cloud accounting software is no exception. It’s still installed on a machine or computer, but the computer or machine on which it’s installed is part of the cloud. Therefore, you can access cloud accounting software over the internet.
Differences Between On-Premise and Cloud Accounting Software
On-premise and cloud accounting software differ in several ways. On-premise accounting software is typically more secure. It’s installed on a local machine or computer, resulting in better protection against cyber attacks.
Cloud accounting software, on the other hand, is more accessible. You can access it from any computer, assuming the computer is connected to the internet. On-premise accounting software doesn’t offer internet accessibility. You can only access on-premise accounting software on the computer or machine on which it’s installed.
Of course, internet accessibility means that cloud accounting software won’t work without the internet. If your internet connection goes down, you won’t be able to use the software. This isn’t an issue with on-premise accounting software. You can use on-premise accounting software with or without the internet.
While costs vary, on-premise accounting software may cost more upfront. You’ll have to invest more in hardware and infrastructure. Cloud accounting software, on the other hand, has upfront costs, making it a popular choice among small business owners. These are just a few of the key differences between on-premise and cloud accounting software.
Have anything else to add? Let us know in the comments section below!

Working Capital Loans: Essential Funding for Daily Operations
 Business loans come in different types. There are general-purpose business loans that can be used to cover a variety of expenses, and there are specific-purpose business loans that are used to cover a type of expense. Working capital loans fall under the latter category. For a better understanding of working capital loans and how they work, keep reading.
What Are Working Capital Loans?
Working capital loans are business loans that are used to cover every day business-related expenses. They aren’t used to purchase equipment or other long-term assets. Instead, working capital loans are used to cover operational expenses like rent, inventory and payroll. Work a working capital loan, new and early-stage businesses can stay afloat while they continue to grow and, hopefully, become profitable.
How Working Capital Loans Work
As a form of debt financing, working capital loans require repayment. You can apply for a working capital loan at banks and other lenders. Depending on the specific type of working capital loan for which you are applying, the lender may look at your credit to determine whether you are a good candidate.
Unsecured working capital loans typically require a high credit score. It shows that you are able to repay your debt, so lenders will be more likely to give you a working capital loan. Secured working capital loans are based on collateral. Therefore, most lenders pay little or no attention to credit scores for secured working capital loans. You can get a secured working capital loan regardless of your credit; you just need to provide collateral.
Reasons to Consider a Working Capital Loan
A working capital loan offers a convenient source of capital for new and early-stage businesses. It can take at least several years for startups to become profitable. During this time, they’ll burn through their available capital. Fortunately, there are financing solutions available, one of which is a working capital loan. A working capital loan will allow these new and early-stage businesses to keep their doors open during their early years.
Working capital loans are fast. The have a shorter approval process than many other types of loans. The end result is faster capital with which entrepreneurs can finance their operations.
Entrepreneurs don’t have to give up ownership of their businesses with working capital loans. Only equity financing involves the sale of ownership. Working capital loans are debt financing, so this isn’t an issue.
Have anything else to add? Let us know in the comments section below!
QuickBooks: Troubleshooting Payment Problems With Invoices
 Do you use QuickBooks to generate and send invoices to your business’s customers? With QuickBooks Payments, you don’t have to use a separate invoicing service; you can generate invoices directly from QuickBooks Online or QuickBooks Desktop.
Upon receiving an invoice, the customer can elect to pay it online. There should be a “Pay invoice” button. Clicking this button will take the customer to the payment screen where he or she can pay the invoice. QuickBooks Payments supports credit card, debit card and Automated Clearing House (ACH) payments. There are certain problems, however, that may prevent customers from paying the invoice.
Missing Button
The invoice may not feature the “Pay invoice” button, in which case the customer won’t be able to pay it. This is typically the result of not using QuickBooks Payments. The “Pay invoice” button will only be displayed on the invoice if you use QuickBooks Payments.
You can create and send invoices without Payments QuickBooks. As long as you have QuickBooks Online or QuickBooks Desktop, you can take advantage of the invoicing feature. But customers will only be able to pay the invoices if you use QuickBooks Payments. If your business’s customers don’t see the “Pay invoice” button, you’ll need to sign up for QuickBooks Payments.
Error When Making Payment
Customers may encounter an error message when attempting to make a payment. Depending on the particular type of error message, it may offer instructions on how to resolve it. Customers can follow the included instructions to fix the error and, thus, complete their payment.
Not all error messages will come with instructions. If there are no instructions, customers should attempt to clear their web browser’s cache. Caches are temporary storage areas. Web browsers have a cache in which internet files are temporarily stored. In some cases, issues involving these temporary internet files may prevent customers from completing their payment with the invoice.
Declined Card
Another problem that may arise when customers attempt to pay the invoice is a declined card. This is typically the result of one of two things: the customer entered the wrong card information, or the payment amount exceeds the card’s limit. Customers can fix these issues by entering the correct card information or using a different card with a higher limit.
Have anything else that you’d like to add? Let us know in the comments section below!
Key Financial Metrics Every Business Owner Should Monitor
 What financial metrics do you monitor? As a business owner, you can’t ignore the importance of financial metrics. They can provide invaluable insight that can help you make smarter business-related decisions. Some financial metrics, however, are more useful than others. Here are some of the top financial metrics that every business owner should monitor to ensure their long-term future success.
Gross Profit Margin
Gross profit margin is a financial metric for profitability. It’s the percentage of your business’s total revenue that exceeds the cost of production. You can calculate it by taking your business’s cost of goods sold (COGS) and subtracting that number from your business’s total revenue. After converting the final number into a percentage, you’ll have your business’s gross profit margin.
Net Profit Margin
Even if you monitor your business’s gross profit margin, you should still monitor its net profit margin. Net profit margin is a financial metric for profitability as well, but it takes into account all business-related expenses. You can calculate it by taking your business’s net profit and dividing that number by your business’s revenue. After multiplying this new number by 100, you’ll have your business’s net profit margin. Because it takes into account all of your business’s expenses — as opposed to only your business’s COGS — net profit margin is arguably more important than gross profit margin.
Debt-to-Equity Ratio
Another financial metric all business owners should monitor is debt-to-equity ratio. As the name suggests, this represents your business’s debt relative to its equity. Nearly all businesses have a combination of debt and equity. The more debt your business has relative to its equity, the higher your business’s debt-to-equity ratio will be. You should typically strive for a debt-to-equity ratio of 2.5 or less.
Cash Burn Rate
All business owners should monitor their cash burn rate. This financial metric represents the rate at which your business spends or uses its cash reserves. New businesses often have a high cash burn rate. They spend their cash reserves quickly to accommodate their growth.
Inventory Turnover Ratio
Inventory turnover ratio is an important financial metric for businesses. It represents how many times your business “turns over” its inventory relative to your business’s COGS during a specific period. You want to sell your business’s products or services as quickly as possible. Inventory turnover ratio can give you a better understanding of the speed at which you sell or “turn over” your business’s inventory.
Have anything else that you’d like to add? Let us know in the comments section below!

What Is an Adjustable-Rate Loan and How Does It Work?
 Not all loans have a fixed interest rate. In addition to fixed-rate loans, there are adjustable-rate loans. Whether you’re looking to refinance some of your business’s existing debt, or you simply need new capital for growth and expansion, you may want to consider an adjustable-rate loan. It’s still a form of debt that, like other forms of debt, must be repaid. What is an adjustable-rate loan, and how does it work?
What Is an Adjustable-Rate Loan?
An adjustable-rate loan is a type of debt-based loan with a variable interest rate. Variable means the interest rate can change. You may get an adjustable-rate loan with an initial 6% Annual Percentage Rate (APR). After a few months, though, the APR may drop to 5%, and then it may go up to 7% later down the road. Regardless, adjustable-rate loans are defined by their variable interest rate.
How an Adjustable-Rate Loan Works
You can apply for an adjustable-rate loan at a bank, credit union or a similar lending facility. The application process varies from lender to lender, but most of them will either require collateral, or they will look at your credit score.
Adjustable-rate loans can be unsecured or secured. Unsecured adjustable-rate loans don’t require collateral, whereas secured adjustable-rate loans do require collateral. As long as you meet the lender’s requirements, you should get approved for this financing vehicle.
All adjustable-rate loans have an initial interest rate, which is a percentage of the principal amount. The interest rate, however, may change over time.
What Determines the Interest Rate of an Adjustable-Rate Loan?
The interest rate of an adjustable-rate loan is determined primarily by the federal funds rate. When banks lend money to other banks, they charge interest based on the federal funds rate as well. This is the universal interest rate set by the Federal Reserve.
While it explicitly defines the interest rate that banks charge each other when lending money, the federal funds rate has a trickle-down effect. A high federal funds rate will make it more expensive for banks to borrow money from each other. As a result, banks will charge more for loans, credit cards, mortgages, etc. This applies to adjustable-rate loans as well. As the federal funds rate increases, banks will raise the interest rate on these loans. As the federal funds rate decreases, conversely, they will lower the interest rate on these loans.
Have anything else that you’d like to add? Let us know in the comments section below!

The Dos and Don’ts of Crafting a Business Plan
 Whether you own a small or large business, you should create a plan for it. A business plan is an invaluable document that can benefit your business in several ways. It will outline your business’s goals, and more importantly perhaps, it will reveal what steps you must take to achieve those goals. There’s a right way and a wrong way, however, to craft a business plan.
Do Start With a Summary
Business plans should always start with a summary. This initial section should summarize the content of your business plan. It doesn’t have to be long. Rather, a single page should suffice for the summary. The summary will serve as an introduction to the rest of your business plan.
Don’t Set Unattainable Goals
Goals, of course, are an important part o a business plan. You’ll need to include both short-term and long-term goals in your business plan, and you’ll need to explain how you intend to achieve them. When creating goals, though, make sure they are attainable. Setting unattainable goals will only backfire.
Do Perform Market Research
You’ll need to perform market research when crafting a business plan. Most business plans include a strengths, weaknesses, opportunities and threats (SWOT) analysis. With a SWOT analysis, you’ll have to describe these aspects of your business, which requires market research.
Don’t Use Outdated Financial Information
All business plans have a section with financial information as well. After all, many business owners use their respective plans to secure funding from lenders or investors. They’ll present their business plans to lenders or investors in an effort to raise capital. When creating this section for your business plan, avoid using outdated financial information. The information included in this section needs to be accurate and up to date.
Do Proofread
When you are finished creating your business plan, you should proofread it. Errors are bound to happen. Allowing errors to go unfixed, though, creates an unprofessional image for your business’s brand. Fortunately, errors in business plans are easy to fix. And once fixed, you can rest assured knowing that they won’t bring down your business’s brand.
Don’t Set and Forget
A business plan isn’t something that you should set and forget. As your business changes, you’ll need to revise your business plan to reflect these changes. Failure to update your business plan will result in outdated or incorrect information.
Have anything else that you’d like to add? Let us know in the comments section below!

P2P Lending vs Crowdfunding: What’s the Difference?
 Do you know the difference between peer-to-peer (P2P) lending and crowdfunding? While some businesses use a traditional loan to finance their operations, others seek alternative financing. P2P lending and crowdfunding are two of the most common forms of alternative financing. Neither of them involves traditional banks. With P2P lending or crowdfunding, businesses can obtain capital through a non-banking channel. Here’s everything you need to know about P2P lending and crowdfunding.
What Is P2P Lending?
P2P lending is a form of alternative financing in which businesses borrow money from lenders on a third-party platform. Also known as marketplace lending, it involves the use of an intermediary. The intermediary is the platform or “P2P lending platform.” P2P lending platforms are designed to connect businesses in need of money with lenders. Both businesses and lenders use P2P lending platforms to find the opposite party.
What Is Crowdfunding?
Crowdfunding is a form of alternative lending that involves seeking capital — typically small investments — from a large pool of investors. Most forms of financing involve a single investor, such as a bank or venture capitalist. Crowdfunding, though, involves many different investors. There are often hundreds or even thousands of investors for a typical crowdfunding project.
Differences Between P2P Lending and Crowdfunding?
While they are both classified as forms of alternative financing, P2P lending and crowdfunding aren’t the same. One of the ways in which they differ is the structure. P2P lending is structured as a loan. With P2P lending, you can borrow money from a lender, which you’ll be required to pay back with interest. Crowdfunding uses a different structure. It’s not a loan. Instead, you can offer rewards to investors or equity to investors.
Another difference between P2P lending and crowdfunding is that the former involves a single investor, whereas the latter involves multiple investors. With P2P lending, you’ll partner with a single investor using a P2P lending platform. With crowdfunding, you’ll partner with many different investors, potentially thousands of investors.
Investors have different levels of control with P2P lending and crowdfunding. P2P lending allows investors to control their portfolios. Crowdfunding, in comparison, provides investors with influence over decision-making.
P2P lending and crowdfunding are used for different purposes. P2P lending is used for general-purpose business loans. Crowdfunding, in comparison, is used for startups, new projects, charities and other, more specific types of financing projects.
Have anything else that you’d like to add? Let us know in the comments section below!
