

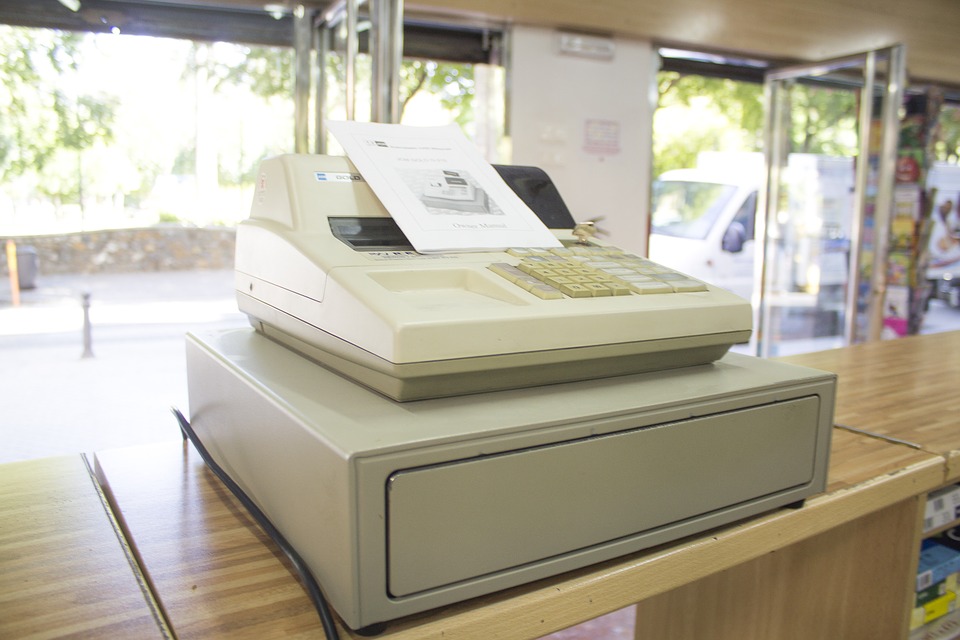
How to Delete a Bank Account From Quickbooks
 One of the great things about adding your bank accounts to Quickbooks is that it allows you to see all the transactions — including deposits, withdrawals and payments — from Quickbooks. Rather than logging in to each of your online bank accounts, for example, you can simply launch the Quickbooks accounting software. It will automatically pull data from your respective bank accounts, revealing this information in a single, convenient interface. There are times, however, when you may need to remove a bank account from Quickbooks. So, how do you delete or remove a bank account from Quickbooks?
How to Hide a Bank Account
In some cases, hiding the bank account might be better than actually deleting it. When you hide a bank account, Quickbooks will retain all the data from the account, but it will remove this information from the screen so that you can navigate the accounting software more easily. As a result, you can still access your bank account’s information from Quickbooks even when it’s hidden.
To hide a bank account, log in to Quickbooks and click the gear icon at the top of the screen. Next, click the drop-down menu and select “Bank Accounts.” You can then scroll through the list of bank accounts to choose the one that you’d like to hide. Next to the account name, click the toggle button for “Show Account” so that it displays “OFF” rather than “ON.” Once finished, Quickbooks will hide this bank account.
How to Delete a Bank Account
Hiding a bank account doesn’t actually remove it Quickbooks. To completely remove a bank account, you’ll need to delete it. This involves going back to the main Quickbooks screen and clicking the gear icon. Next, click the drop-down menu again and select “Bank Accounts.” Scroll through the list of bank accounts until you find the account that you’d like to delete. You should see a trashcan icon in the upper-right corner of the account window. Clicking this icon will initiate the delete process. Quickbooks will ask you to confirm the account’s deletion by entering “DELETE,” after which the account will be removed from Quickbooks.
Remember, deleting a bank account completely removes the account from Quickbooks. This is a permanent action that you cannot undo. Therefore, it’s recommended that you create a backup before attempting to delete any bank accounts from Quickbooks.
Have anything else that you’d like to add? Let us know in the comments section below!

Creating a Delayed Charge Invoice in Quickbooks
 It’s not uncommon for business owners to invoice their customers or clients at different intervals. While some business owners collect payment during the transfer of the goods or services, others wait until later. When accepting payment after the delivery of goods or services, you should consider using a delayed charge invoice. As the name suggests, this special type of invoice “delays” the charge, allowing customers or clients to pay for their purchase at a later date. To learn more about delayed charge invoices and how to create them using the Quickbooks accounting software, keep reading.
You can easily create a delayed charge invoice in Quickbooks Online — the cloud-based version of Intuit’s accounting software — by logging in to your account, clicking the (+) menu at the top of the screen and choosing “Delayed Charge” under the column for “Customers.” From here, you’ll need the select to whom you want send the delayed charge invoice. If the customer isn’t listed in your Quickbooks account, you’ll need to add him or her by clicking the “+Add new” button. While adding a new customer may sound tedious, you don’t have to enter all the information for the customer. Rather, creating a delayed charge invoice only requires you to enter the customer’s name. You can go back into your Quickbooks account later to update the customer’s other information.
After selecting the customer, Quickbooks will prompt you to enter a date for the purchased product or service. Keep in mind that this is not the “due date” for the invoice. This is the date on which the customer agreed to purchase the product or service. Double check the date to ensure it’s correct, at which point you can proceed to the next step. Next, you’ll need to enter the product or service that you sold to the customer. Like customers, Quickbooks allows you to select the product or service from a drop-down menu. And if the product or service isn’t listed in your Quickbooks account, you’ll need to add it by clicking the “Add” button.
You’re almost finished. Now comes the process of choosing an “Income Account” in the “Product or Service Information” field. Finally, enter a price for the product or service, followed by clicking “Save and Close” to complete the process. Once finished, you’ll have a delayed invoice ready for the customer or client.
Did this tutorial work for you? Let us know in the comments section below!

How to Record a Bounced Check Payment in Quickbooks
 When accepting checks as a form of payment for your business’s products or services, you run the risk of having the check bounce. If the customer doesn’t have enough funds in his or her bank account to cover the cost of the purchased product or service, the check will bounce. Typically known as non-sufficient funds (NSF), it’s a common occurrence encountered by countless businesses. To prevent a bounced check from negatively impacting your business’s financial records, though, you’ll need to record it. If you use Quickbooks, you can easily record a bounce check payment in just a few simple steps.
Bounced Check Feature
Quickbooks Desktop actually has a bounced check feature that’s designed specifically for recording bounced check payments. To use this feature, log in to your Quickbooks account and click Customers > Customer Center > Transactions > Received Payments. From here, you’ll see a list of all payments that your business has received. Scroll through the list until you see the payment associated with the bounced check, at which point you can double-click it to record it as an NSF.
There are a few more steps to recording a bounced check using this feature, however. Once you’ve marked the customer’s payment as an NSF, you’ll need to access the “Receive Payments” window, from which you can click the “Record Bounced Check” option. Keep in mind that you can only record a bounced check if the check is not waiting to be cleared. Rather, this feature is only available to checks that have been cleared by the respective bank, even if the clearing resulted in an NSF.
Manually Recording Bounced Check
You can also record a bounced check payment in Quickbooks manually. This is a slightly more tedious process, but it’s still a viable solution for handling these bad payments. To record a bounced check manually, you’ll need to create an account as well as an item to track the NSF. Next, you must record the NSF that your business incurred from its bank. Finally, you can reverse the customer’s original payment so that it doesn’t affect your accounting records. While optional, you can also send the customer an invoice for the NSF fee charged by your bank. If you don’t send a customer an invoice for this fee, your business will incur this expense, which is usually around $30 or $40.
Did this tutorial work for you? Let us know in the comments section below!
How to Record Cash Sales in Quickbooks
 In recent decades, credit cards have become the preferred method of payment among consumers. When buying a product or service, most consumers prefer to pay using a credit card. But while it’s the most common type of payment, it’s not the only option available for consumers. Many consumers still pay using cash. As a business owner, you must properly record these cash sales so that they won’t throw off your financial records. Using the Quickbooks accounting software, you can easily record cash sales in just a few simple steps.
Handling cash transactions in Quickbooks requires a different approach than credit card, debit card and check transactions. When you receive payment from a customer, you typically record the payment immediately when you receive payment. If a customer pays using cash, however, you can wait until the end of the day to record the payment. This involves creating a Sales Receipt template for each day during which you received at least one cash payment from a customer.
To create a Sales Receipt template in Quickbooks, you’ll also need to create a Products/Services with various account types, including sales category, sales tax, overage/underage and cash. Basically, you want to record all of the sales as positives and all the cash payments that you’ve received from customers as negatives. At the end of the day, you can compare these numbers to ensure that the balance equals zero. The total amount of your positives should be the same as your negatives. If your positives for the day are higher than your negatives, this indicates an underage — meaning your cash register is short and you didn’t receive all the payments from your customers for the day.
A typical sales receipt in Quickbooks lists the sales amount, sales tax and cash payment. The sales amount and sales tax are positive, whereas the cash payment amount is negative. When you add the items together, they should equal zero. If it’s not zero, you made an error and should go back to try and identify it.
After creating a sales receipt, go back to your Quickbooks account and access the “Undeposited Funds” section, at which point you can record the deposit amount. This, of course, is the amount of money from the cash payment that you deposited into your back account. For more help on creating recurring templates, including Sales Receipt templates, in Quickbooks, check out this Intuit article.
Did this tutorial work for you? Let us know in the comments section below!
How to Modify a Sales Receipt That’s Been Deposited in Quickbooks
 Do you need to modify a sales receipt that you’ve already deposited into your bank account? In Quickbooks, you can’t edit or otherwise modify a sales receipt after depositing it. However, there’s a simple workaround that will allow you to make changes to it. This involves removing the sales receipt, followed by editing it, and then adding it back to your deposit. It may sound like a lot of work, but it’s actually relatively easy and painless. Here’s how to modify a sales receipt in Quickbooks that you’ve already deposited.
First and foremost, you’ll need to remove the sales receipt from the deposit. This is done by logging in to your Quickbooks account and clicking the gear icon at the top of the page, followed by “Chart of Accounts.” After locating the deposit account, click the “View register.” Next, locate the deposit with the sales receipt and click “Edit.” You can then click the check mark to remove the transaction from the deposit. Complete the process by clicking “Save,” followed by “Yes.”
After removing the sales receipt from the deposit, you’ll need to edit the payment. Go back to the home screen of your Quickbooks account and click the gear icon, followed by “Chart of Accounts” again. After locating the deposit account, click “View register.” Next, locate and open the deposit. You should see a “Received From” field, in which you can choose the customer whom paid you the money. Clicking the customer’s name will open the “Sales Receipt” window, and here you can modify the payment. When finished, click “Save” and “Yes” to complete the changes.
The final step is to replace the sales receipt in the deposit. Remember, the entire process of modifying a sales receipt that you’ve already deposited involves removing the sales receipt from the deposit, editing it, and then adding it back. With your sales receipt edited, it’s time to add it back. Go back to your “Chart of Accounts” and “View register,” and choose the deposit. From here, you can click “Edit” to add it back. When finished, click ‘Save and Yes,” after which the newly corrected deposit should now appear in your account. Keep in mind that you may see the letter “R” next to your deposit. If present, this indicates that it has been reconciled.
Have anything else that you’d like to add? Let us know in the comments section below!

How to Run a Retained Earnings Report in Quickbooks
 As most business owners already know, retained earnings are the profits invested back into a business. When a business generates profits, it may spend those profits on products, services or payroll to further grow and reach new customers. The money invested for this purpose is classified as retained earnings. While most business owners are familiar with the general concept of retained earnings, many don’t know how to view this financial metric in their books. Assuming you use Quickbooks, however, you can run a retained earnings report.
When viewing your business’s balance sheet in Quickbooks, you won’t see retained earnings. This is because retained earnings is considered a rollover from all your business’s past years of profit or loss. Therefore, the correct way to view your business’s retained earnings is to run a “Profit and Loss” report.
To run a “Profit and Loss” report in Quickbooks, log in to your Quickbooks account and click “Reports” from the menu on the left-hand side. In the “Go to” field, select “Profit and Loss,” followed by “Profit and Loss” report. You should see a new menu for the “Profit and Loss” report appear. Click the drop-down menu next to “Report period,” and select “All Dates.” Next, click “Run Report” so that Quickbooks will create a report for your business’s profits and losses. Once Quickbooks finishes with the report, choose “Net income” for the amount.
Assuming you followed these steps correctly, you’ll see a “Profit and Loss” report that includes all transactions that affected your business’s finances. Of course, this method shows your profits and losses from all previous years. You can run a “Profit and Loss” report by year by making a few changes. This is done by choosing “Reports” from the main main, followed by “Profit and Loss” in the “Go to” field. However, you’ll need to click “Customize” in the upper-right corner of the report menu, followed by “Rows/Columns.” Next, click the “Columns” drop-down menu and choose “Fiscal Years” or “Calendar Years.”
It’s a good idea to run a “Profit and Loss” report on a regular basis. Using this report, you’ll be able to see your business’s retained earnings, thereby giving you a better understanding of your business’s financial health. Without this information, you won’t be able to make educated decisions regarding your business’s finances and its future.
Did this tutorial work for you? Let us know in the comments section below!

What Is Progress Invoicing in Quickbooks?
 When using Quickbooks to keep track of your business’s financial transactions, you’ll probably come across the term “Progress Invoicing.” This billing feature works like traditional invoices but with one major difference: Progress Invoicing is used to send many small invoices to a customer rather than a single invoice for 100% of the money owed. It’s called Progress Invoicing because it invoices the customer based on the progress of the work or job purchased. To learn more about Progress Invoicing and how to use this feature in Quickbooks, keep reading.
The purpose of Progress Invoicing is to bill customers incrementally rather than all at once. When a business sells a service to a customer, it may send the customer an invoice requesting payment. From landscapers and painters to advertising firms and doctors, countless businesses use invoices to bill their customers and collect payment for their services or goods sold. And while you can always use the traditional invoicing method of sending customers a single invoice, Progress Invoicing is a viable alternative that’s particularly useful for jobs that require a significant amount of time to complete.
Not all businesses need to use Progress Invoicing. While there’s no single right way to use it, Progress Invoicing is best used to bill customers for work that’s completely in incremental stages. A business-to-business (B2B) advertising company, for example, may use this feature to send its customers partial bills at different stages of their service. When one segment of the company’s advertising service has been completed, it may send the customer a partial invoice. And after the company completes the next segment of its service, it may send the customer a second partial invoice. There’s no limit to the number of partial invoices that you can send using Progress Invoicing. The most important thing, however, is that you invoice customers for the appropriate amount. In other words, don’t overbill your business’s customers by sending them too many partial invoices.
You can enable Progress Invoicing in Quickbooks Online by logging in to your account and clicking the gear icon at the top of the page. From here, click Account > Settings > Sales > Progress Invoicing. You’ll then need to click the pencil icon, followed by choosing “Create multiple partial invoices from a single estimate.” To complete the process, click “Save,” followed by “Done.” Quickbooks Online will now allow you to create an invoice using one of your saved estimates.
Have anything else you’d like to add? Let us know in the comments section below!

How to View History of All Transactions in Quickbooks
 Want to view the history of all your business’s financial transactions? Assuming you use Quickbooks, you can pull a report of all your transactions. Known as an Audit Log report, it reveals every change that you’ve made to your Quickbooks account, including expenses, revenue and more. Running an Audit Log report on a regular basis is a great way to ensure that your business’s financial records are accurate and up to date. However, you’ll need to follow a few steps to run an Audit Log report in your Quickbooks account.
First, log in to your Quickbooks account, and then click the gear icon at the top of the page. From here, choose “Audit Log” under the “Tools” menu. This will automatically run a report containing all your transactions entered into Quickbooks. You can then save or email this report, according to your preference.
Of course, some business owners have many changes related to a single transaction. In this case, you’ll want to run an “Audit History” for the respective transaction to see a list of all changes that you’ve made to it. This is done by opening the transaction that you’d like to see the changes for, at which point you can click the “More” button at the bottom of the transaction page, followed by “Audit History.” Quickbooks will then open the “Audit Trail” for the transaction, including a breakdown for all changes associated with the transaction. You can expand the information contained in this report by clicking “Show All.” Alternatively, you can click “Compare” to compare the transaction with one or more other transactions.
It’s important to note that Quickbooks will display a maximum of 150 records in the “Audit Log.” For most businesses, 150 records is more than enough to cover any single transaction. But there are some businesses that process more than 150 records per transaction. If this sounds familiar, you’ll need to scroll to the bottom of the transaction and click “More.” This will prompt Quickbooks to display any additional records past the 150 mark.
According to Intuit, the “Audit Log” may contain a variety of information that’s created by Quickbooks. Support Representatives, for instance, denotes a change made by a Quickbooks consultant, whereas “System Administration” denotes a change that was automatically made by the Quickbooks software. Either way, you should be aware of these chances when running and analyzing an “Audit Log” for your business.
Did this tutorial work for you? Let us know in the comments section below!

What Is Bad Debt and How Do I Record It in Quickbooks?
 It’s not uncommon for businesses to allow customers to pay after their product or service has been delivered. A landscaping company, for example, may send its customers an invoice requesting payment after their landscaping service has been finished. Unfortunately, though, customers don’t always pay. And when a customer fails to pay, it can hurt a business’s finances. As a business owner, it’s important that you understand bad debt and the process for recording it in your accounting software.
Bad Debt Explained
Bad debt is any debt that you are unable to collect from the respective customer or client. Debt becomes bad after you’ve exhausted all collection attempts to no avail. If you’ve contacted the customer a dozen or more times and haven’t been able to collect payment, it’s probably a good idea to write it off as a bad debt. Recording the unpaid invoice as bad debt helps to balance your business’s books so that it doesn’t appear as revenue when the customer never paid for it.
The Cash Basis Method
In Quickbooks, you can record bad debt using the cash basis method. According to Intuit, this is the correct way to record it if you file your business’s taxes on a cash basis. It eliminates the unpaid invoice as income, essentially lowering your taxable income and improving your business’s finances in the process.
To record bad debt using the cash basis method, you’ll need to void or delete the unpaid invoice. This is done by logging in to your Quickbooks account and choosing “Sales” or “Invoices” at the top of the menu, followed by “Customers.” From here, choose the name of the customer who didn’t pay his or her invoice. Next, click “Open Invoices” next to the drop-down menu for “Show.” You can then select a date range for “Date” to narrow down your selection of invoices. Once you’ve located the unpaid invoice, click it to select it. This will open the invoice, at which point you can choose “More,” followed by “Void.” Quickbooks will then ask you to confirm the voiding of the invoice.
While optional, many business owners prefer to add a memo to unpaid invoices recorded as bad debt. You can do this by going back into your Quickbooks account and opening the invoice, followed by adding a memo with the note “bad debt.”
Did this tutorial work for you? Let us know in the comments section below!
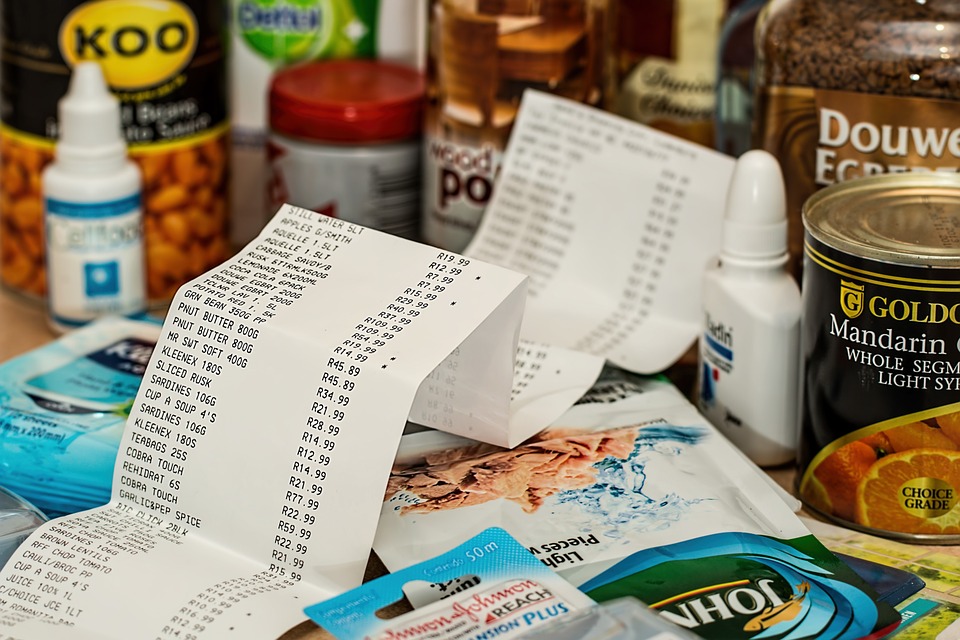
Sales Invoice or Receipt: Which Is Best for Quickbooks?
 If you’re a business owner who uses Quickbooks, you might be wondering whether you should create a sales invoice or receipt. If your business sells a product or service — like virtually all businesses do — you’ll need to provide customers with either a sales receipt or invoice. Both are used as confirmations or verification of a purchase. And while they are similar in this regard, they each have their own unique purpose. As a business owner, you should familiarize yourself with the nuances between sales invoices and receipts so that you can create the right one in Quickbooks.
Consider the Customer’s Payment
To determine whether you need to create a sales invoice or receipt in Quickbooks, you’ll need to consider the customer’s payment. If the customer paid in full at the time of purchase, you’ll need to create and send him or her a sales invoice. A sales invoice differs from a receipt in the sense that it requires the customer to pay at a later date, whereas a receipt shows that the customer has already paid. You should only create a receipt for a customer if the customer has paid for his or her purchase in full. For all pending payments in which a customer can pay after he or she purchased a product or service, you should user an invoice instead.
How to Create a Sales Invoice in Quickbooks
To create a sales invoice in Quickbooks, log in to your account and click the (+) sign at the top of the page, followed by “Invoice.” You can then enter the relevant information associated with the customer’s purchase. From here, click the (+) sign and choose ” Receive Payment” to close the invoice and finish the process. Keep in mind that if you deposit a customer’s payment using the “Bank Deposit” screen, his or her payment won’t be associated with the invoice, thereby leaving the invoice marked as “unpaid.”
How to Create a Sales Receipt in Quickbooks
If a customer paid in full at the time of purchase, you should create a sales receipt in Quickbooks. This is done by logging in to Quickbooks and clicking the (+) sign at the top of the page. Next, choose “Sales Receipt,” after which you can enter all the relevant information associated with the customer’s purchase. According to Intuit, business owners should enter the payment information for a sales receipt at the time when they enter the sale.
Did this tutorial work for you? Let us know in the comments section below!