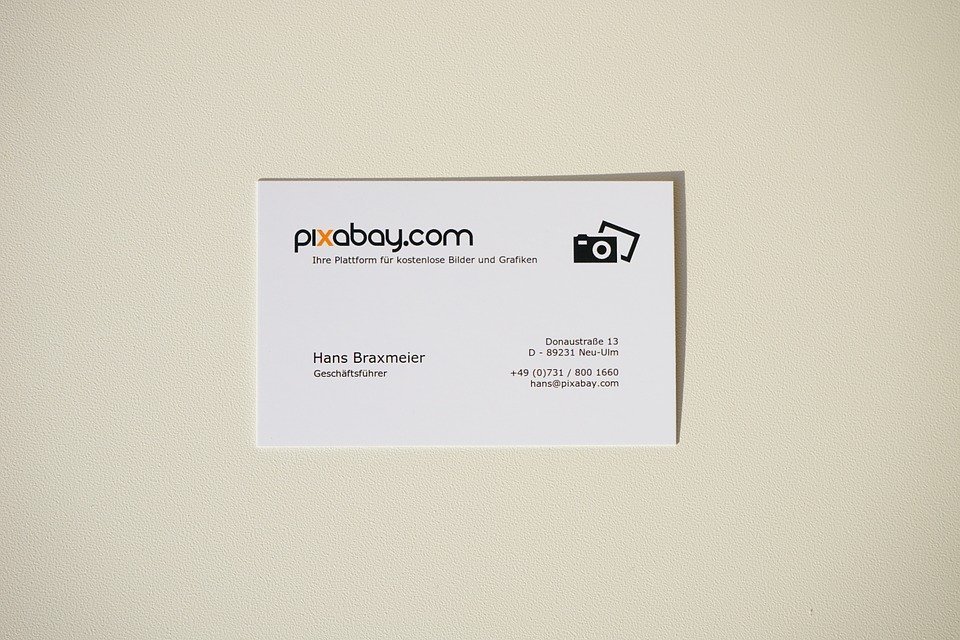
Are Business Cards Still Useful?

If you operate a small business, you might be wondering whether you should invest in a set of business cards. With the advent of the internet and digital media, paper-based business cards have become less common. As a result, some business owners assume they are no longer useful or relevant. While business cards aren’t as popular as they were several decades ago, however, they can still help your business in several ways.
You Can Hand Them to Potential Customers in Person
When you encounter a potential customer who’s contemplating purchasing your small business’s products or services, you can give him or her one of your business cards. Not everyone owns a smartphone. And if a potential customer doesn’t have a mobile device, he or she may not remember your small business’s name or contact information. A simple solution is to give potential customers a business card.
They Project Credibility
Business cards also project credibility. Customers and potential customers will view your small business as being more credible than its competitors if you give them a business card. You can create custom business cards using your small business’s logo, color scheme and other visual brand elements. Upon seeing this highly professional design, customers and potential customers will feel confident knowing that your small business is credible and legitimate.
Educates Potential Customers About Your Business
Business cards can contain more than just your small business’s name; they can include other relevant information such as your small business’s photo number, address, email address, website address and hours of operation. As a result, they are highly useful for educating potential customers about your small business.
You Can Leave Them Behind
A benefit of using business cards that’s often overlooked is the fact that you can leave them behind. Many restaurants, for example, hold giveaway drawings using business cards left by their customers. If you dine at one of these restaurants, you can place your business card in a jar for a chance to win a prize. Most importantly, though, other patrons may see your business card inside the jar, thereby giving your small business additional exposure.
They Are Inexpensive
Finally, business cards are relatively inexpensive, so they won’t hurt your small business’s finances. You can often purchase up to 500 custom business cards for as little as $50, essentially making them 10 cents a piece.
What are your thoughts on business cards? Let us know in the comments section below!

Equity vs Debt Financing: What You Should Know

If you’re in the early stages of launching a new business, you’ll need to raise capital to cover expenses like payroll, inventory, insurance, equipment and more. There’s an old saying that it takes money to make money. Regardless of what type of business you intend to run, you’ll need to purchase products and services to get it off the ground. With that said, there are different financing options available for new businesses, including equity and debt financing.
What Is Debt Financing?
Debt financing refers to borrowing money from a lender under the agreement that you’ll repay it according to the lender’s terms. It’s called “debt financing” because it requires businesses to take on debt. The lender loans you money to use for your business, but you’ll have to pay it back — along with interest in most cases — to comply with the terms and conditions created by the lender.
Not all debt financing is the same. Granted, your business will take on debt when using debt financing, but some forms are easier to obtain than others. Secured debt financing, for example, requires the use of assets with a monetary value as collateral. You essentially “secure” this form of financing using collateral. As a result, banks and lenders have more lenient requirements for secured debt financing as opposed to unsecured debt financing, the latter of which doesn’t use or otherwise require collateral.
What Is Equity Financing?
An alternative to debt financing is equity financing. Equity financing can provide you with money to launch your new business as well, but it’s a completely different form of funding. With equity financing, neither you nor your business will take on debt. Instead, it allows you to sell some of your business’s shares to a financial institution or investment firm.
It’s called “equity financing” because it involves the sale of a company’s equity. Therefore, you won’t own 100% of your business if you use this method to raise capital. But the good news is that you won’t take on debt from equity financing, either.
So, should you use debt financing or equity financing to raise capital for your new business? It really depends on the type of business you operate as well as your own goals and objectives. Some businesses prefer the simplicity of debt financing, whereas others prefer equity financing. Assess your business and goals and objectives to determine which financing vehicle is right for you.
Have anything else that you’d like to add? Let us know in the comments section below!

What Is an Adjusting Journal Entry in Quickbooks?

In Quickbooks, adjusting journal entries are used to change the balance of an account. If you discover an account has the wrong balance, for example, you can create an adjusting journal entry to fix it. With that said, you’ll need to follow the correct steps to create an adjusting journal entry. To learn more about this feature in Quickbooks and how to use it, keep reading. In this post, we’re going to reveal everything you need to know about adjusting journal entries in Quickbooks.
Do I Need to Create an Adjusting Journal Entry?
Not all businesses need to create adjusting journal entries. As previously mentioned, they are used to chance the balance of an account. Assuming an account has the correct balance, using an adjusting journal entry won’t offer any benefit.
Of course, there are still times when you may need to create an adjusting journal entry. If you recently discovered a credit card fee imposed to your business’s account, for example, you may want to create an adjusting journal entry to account for the newly imposed fee. If you’re trying to record amortization, you may also want to create an adjusting journal entry.
How to Create an Adjusting Journal Entry
To create an adjusting journal entry, log in to Quickbooks and select the client’s name from the drop-down menu titled “Go to client’s Quickbooks.” From here, click the (+) sign, followed by “Journal Entry” below the “Other” menu. Quickbooks will then ask you whether this is an adjusting journal entry. Select “Yes,” after which you can enter the appropriate information to change the account balance. When finished, click the “Save” button to complete the process.
In addition to creating an adjusting journal entry, you may also want to review your adjusted trial balance. As you may know, the adjusted trial balance contains all the accounts in your business’s general ledger prior to the application of adjusting entries. Therefore, it’s an invaluable tool in double checking your business’s accounts to ensure they are correct.
To run an adjusted trial balance report, go to the home screen of Quickbooks and click the “Reports” link on the left-side menu. Next, type “Adjusted Trial Balance” in the search box and then select the option titled “Adjusted Trial Balance” from the results. This report will display the balances for all your business’s accounts before you applied the adjusting journal entry.
Have anything else you’d like to add? Let us know in the comments section below!

Quickbooks and Sales Tax Tracking: What You Should Know
 As a business owner, it’s important that you calculate — and charge — sales tax on all purchased products and services. When a customer in your business’s state makes a purchase, you are legally required to charge him or her sales tax. Although different states and municipalities have different sales tax rates, most fall somewhere between 4% and 9%, meaning a customer who spends $100 must pay an additional $4 to $9 in sales tax. There’s no denying the fact that sales tax adds a new challenge for business owners. But if you use Quickbooks, you’ll be pleased to hear that it does most of the work on your behalf.
How Sales Tax Rate Is Calculated in Quickbooks
Quickbooks is able to automatically calculate sales tax based on the region in which your business operates. As previously mentioned, there’s no universal sales tax rate for the United States. Rather, it varies depending on the state, city or county, with most places requiring businesses to charge between 4% and 9%. Quickbooks, however, contains an updated list of thousands of tax code rates for U.S. municipalities. Regardless of where your business operates, Quickbooks can automatically calculate your correct sales tax rate.
Charging Customers Sales Tax in Quickbooks
Of course, you’ll need to charge customers sales tax. While it’s best to consult with a professional tax accountant, businesses in the United States are generally required to charge sales tax for all products or services delivered in their respective state or municipality. If you use Quickbooks, however, you can easily charge customers sales tax by adding it to their invoices. Simply pull up the customer’s invoice, at which point you’ll see an option to add sales tax. And because Quickbooks automatically calculates sales tax rate based on your region, you don’t have to worry about trying to find the correct rate.
The Sales Tax Center
Quickbooks actually has a built-in feature that’s designed specifically for sales tax tracking: the Sales Tax Center. Using this feature, you can analyze and report your business’s sales tax. The Sales Tax Center even allows you to receive notifications for when sales tax is due. As you may know, most states require businesses to pay sales tax four time a year — once per quarter. With notifications enabled, you’ll receive an email before the due date of each quarter so that you don’t accidentally miss a tax payment.
Have anything else that you’d like to add? Let us know in the comments section below!

What Is Current Ratio in Accounting?
 Financial accounting is an important task associated with running a business. If you don’t know how much money you spend and how much you generate, you won’t be able to optimize your business’s operations, resulting in lower profits. But there are a number of metrics used to measure a business’s financial health, one of which is current ratio. As a business owner, you should familiarize yourself with current ratio so that you can effectively use this metric in your financial accounting efforts.
Current Ratio Explained
Current ratio is a financial metric used to determine if a business has the adequate amount of money and resources needed to cover its short-term expenses. It’s calculated by taking a business’s current assets and dividing it by the business’s current liabilities. If your business has $500,000 in current assets and $300,000 in current liabilities, its current ratio would be 1.66.
A current ratio above 1.0 indicates that your business’s assets are worth more than the cost of its liabilities. Of course, that’s a good thing. If your business’s liabilities are higher than its assets, your business may spend more money than what it earns. In this regard, current ratio is primarily used to measure a business’s liquidity.
Current Ratio Vs Quick Ratio
Current ratio is often confused with quick ratio. Both of these financial metrics reveal a business’s liquidity by comparing its assets with its liabilities. However, that doesn’t necessarily mean they are the same. The difference between current ratio and quick ratio is that the former takes into account all assets, whereas the latter only takes into account highly liquid assets that can be easily converted to cash in a short period of time. Examples of assets used in the quick ratio formula include cash and accounts receivables.
How to Improve Your Business’s Current Ratio
There are several steps you can take to improve your business’s current ratio. First, try to keep your liabilities to a minimum. In other words, avoid taking out loans or using credit cards to fund your business. Second, work to increase your business’s current assets. With more assets, you’ll achieve a higher current ratio. There are countless ways to increase assets, such as exploring new markets or releasing new products or services. With a little work, you can improve your business’s current ratio, allowing for greater liquidity.
Have anything else that you’d like to add? Let us know in the comments section below!

What Is Detail Type in Quickbooks?
 When using Quickbooks to keep track of your business’s finances, you may come across “detail types.” Intuit’s popular business accounting software allows you to select from one of several account types when you create an account, some of which include expense, income and liability. Depending on the account type, it will place the account into a new subcategory so that it’s properly recorded as per the Generally Accepted Accounting Principles (GAAP). To learn more about detail types in Quickbooks and how to use them, keep reading.
Detail Types Are Chosen Automatically
As previously mentioned, Quickbooks automatically places new accounts into a specific subcategory. Cash, for example, is placed on the Balance Sheet as an asset. Payroll, on the other hand, is placed as a payroll expense. Quickbooks automatically selects the most appropriate detail type for the respective account, meaning you don’t have to worry about choosing a detail type. As long as you select the right account, Quickbooks will categorize it with the appropriate detail type.
How to View Detail Type of an Account
So, how do you view the detail type of a specific account in Quickbooks? To view the detail type of an account, log in to Quickbooks and click the gear icon at the top of the page, followed by “Chart of Accounts.” From here, you should see a list of all your accounts along with their respective detail type.
How to Change the Detail Type
While Quickbooks automatically selects detail types for new accounts, you can change it in a few easy steps. To change the detail type of an account, click the gear icon at the top of the page, followed by “Chart of Accounts.” Next, click “View Register” below the “Action” menu, followed by “Edit.” You can then select “Detail Type” in the pop-up window. After choosing your preferred detail type, click “Save and Close” to complete the process. Quickbooks will ask you to confirm the change before proceeding. It’s recommended that you double check to make sure you’ve selected the right detail type. Assuming everything looks good, choose “Yes” to confirm, at which the account will have a new detail type.
After reading this, you should have a better understanding of detail types in Quickbooks. Selecting the right detail type is essential to your business’s accounting practices because it governs the way in which transactions are recorded.
Have anything else that you’d like to add? Let us know in the comments section below!

What Is Single-User Mode In Quickbooks?
 In Quickbooks, you can switch between two different user modes: single or multi. Although they both allow you to perform basic accounting tasks, there are some key differences between the two modes that shouldn’t be ignored. Therefore, it’s important for business owners and accountants to familiarize themselves with single-user and multi-user mode. Only then will you be able to take full advantage of Intuit’s popular, award-winning accounting software.
Single-User vs Multi-User Mode: The Basics
The primary difference between single-user and multi-user mode in Quickbooks, as you may have guessed, is that the former prevents anyone else from accessing your Quickbooks company file at the same time that you access it. If you are logged in to Quickbooks and viewing or otherwise accessing your company file, anyone else who attempts to access your company file will be blocked — at least until you log out. In comparison, multi-user mode allows multiple people to log in and access your company file. It’s typically used by large businesses where multiple executives, accountants and other workers need to record financial transactions.
It’s important to note that some Quickbooks activities can only be performed single-user mode, whereas others can be performed in either single-user or multi-user mode. If you want to create a portable company file, for example, you’ll need to log in to Quickbooks using the single-user mode. Quickbooks prohibits users from creating a portable company file in multi-user mode. The same applies for rebuilding data — you’ll need to use the single-user mode to rebuild data in Quickbooks.
How to Switch Between Single-User and Multi-User Mode
Now that you know the differences between single-user and multi-user mode in Quickbooks, you might be wondering how to switch between these two different modes. Well, it’s actually a quick and easy process. To switch between single-user and multi-user mode, simple log in to the main Quickbooks interface, at which point you can click the “File” tab at the top of the page, followed by “Switch to Single-user Mode” or “Switch to Multi-user Mode.”
You can learn more about single-user and multi-user mode by searching for “single-user” or “multi-user” in the Quickbooks search bar. This should bring up a Quickbooks help article with information about the two modes and how they differ. As previously stated, though, the primary difference is that single-user mode prevents anyone else from accessing your company file at the same time you access it.
Have anything else you’d like to add? Let us know in the comments section below!

What Are Classes in Quickbooks?
 No, a Quickbooks “class” isn’t a training course where you learn how to use Intuit’s popular accounting software. Although this would make sense, classes in Quickbooks actually refer to something entirely different. So, if you’re planning to use Quickbooks to keep track of your business’s financial transactions, it’s important to familiarize yourself with classes. Only then will you be able to use this feature.
Class Tracking: The Basics
Classes are used to track transactions based one on or more criteria. If you operate a business with multiple locations, for example, you can create a class for each unique location. This way, you can see exactly how many sales one store generated compared to other stores. Class tracking is a relatively simple feature that opens up a world of new possibilities with Quickbooks. In addition to tracking by location, you can use classes to track transactions by account balances, bills and other factors.
Keep in mind that you aren’t required to use class tracking in Quickbooks. On the contrary, most small businesses owners never use this feature. But if you need to separate the financial metrics of some transactions from the rest, using this feature may prove helpful. Class tracking is a highly versatile and customizable feature that simplifies the process of separating transactions into groups.
How to Create Classes
To use class tracking in Quickbooks, you’ll first need to create a class. This is done by logging in to Quickbooks and clicking Edit > Preferences > Accounting. From here, click the “Company Preferences” tab at the top of the screen, followed by “Use Class Tracking.” After ticking the box for “Use Class Tracking,” click “OK” to complete the process.
Now that your class has been created, you can set up the appropriate categories for your accounts. This is done by clicking your lists from the main menu, followed by “Class List.” Next, click the green arrow icon adjacent to the “Class” button. From here, you can click “New” to create a new class for expense accounts, departments or other criteria. You’ll also have the opportunity to enter a name for the class, so choose something that will help you remember what it’s for.
Creating classes in Quickbooks is a pretty simple and straightforward process. However, it’s important that you associate any newly created classes with an expense. If you need assistance with class tracking, contact your Quickbooks hosting provider for assistance.
Have anything else that you’d like to add? Let us know in the comments section below!
What Is a Billable Expense in Quickbooks?
 When using Quickbooks to keep track of your business’s financial records, you may come across “billable expense.” Some business owners assume that billable expenses are any business-related expense, but this isn’t necessarily true. It’s a special type of expense, and recording it requires a different method. So, what is a billable expense, and how to find them using Quickbooks?
Overview of Billable Expenses
A billable expense is a product or service that you, as the business owner, purchases on behalf of a customer or client for the purpose of performing work. It’s called a “billable expense,” because it’s just that: an expense that you can bill. You initially incur the expense because you purchase it on behalf of the customer or client. Later, however, the customer should send you payment for the amount of the expense.
It’s important for business owners to use billable expenses if they purchase products or services on behalf of their customers or clients. Failure to bill customers or clients for the amount of the expense means that your business will end up paying more money, essentially giving the customer or client the purchased item for free. As a business owner, you must collect payment where payment is due, and that includes when purchasing products or services on behalf of your customers or clients — a process that’s easily checked using billable expenses.
How to Access Billable Expenses in Quickbooks
In Quickbooks, you can mark bills, expenses and even checks as billable. Once marked as billable, you’ll have the option of attaching the expense to an invoice. So, if you want to create a billable expense for a customer, simply create a bill or expense, mark it as billable, and attack it to invoice for the appropriate amount.
If you’re having trouble using billable expenses in Quickbooks, you should check to make sure this feature is turned on. This is done by logging in to your Quickbooks account and clicking “Account and Settings.” Next, click “Expenses,” followed by the pencil icon below “Bills and expenses.” You should see a small box labeled “Track billable expenses and items as income.” Click it so that it creates a check mark box, after which you can click “Save” to complete the process. Quickbooks will now allow you to create billable expenses for your customers or clients.
Have anything else that you’d like to add? Let us know in the comments section below!

What Is the Audit Log in Quickbooks?
 If you use Quickbooks for your business’s accounting needs, you may come across the term “audit log” when using the software. While some business owners are familiar with this feature, others are not. And unless you know what exactly the audit log is, you won’t be able to take advantage of this Quickbooks feature. So, what is the audit log in Quickbooks, and how do you use it?
Overview of the Audit Log
The audit log is a Quickbooks feature that displays a list of all changes made to your Quickbooks account. Whenever you receive a payment from a customer, make a payment to a vendor, create a new document or perform any other change, Quickbooks creates a record of it in an audit log. You may never need to view your business’s audit log. But if a problem arises with your books, you can use this feature to see a list of all changes made to your account. As a result, the audit log is an invaluable accounting feature for business owners that can be used to find problems within a business’s financial records.
How to View the Audit Log in Quickbooks
You can view the audit log in just a few simple steps. If you use Quickbooks Online — the cloud-based version of Intuit’s accounting software — log in to your account and click the gear icon at the top of the page, followed by “Audit Log.” You can then click the drop-down menu to select the user, date and event. After choosing your desired settings for the audit log, click Apply. Quickbooks Online will then create a report containing all the changes that you or someone else made to your business’s financial records.
Audit log is also offered in the Quickbooks Desktop, but you’ll need to follow a different set of steps to access it. For Quickbooks Desktop, log in to your account and select Reports > Accountant and Taxes > Audit Trail. Quickbooks will then bring a new menu for the Audit Trail. From here, you can choose your desired settings to customize the report, followed by pressing “OK.” Quickbooks will create a report based on these settings, allowing you to see all changes made to your business’s financial records. Whether you use Quickbooks Online or Quickbooks Desktop, you can run an audit log in just a few easy steps as described here.
Have anything else that you’d like to add? Let us know in the comments section below!
