Creating a Delayed Charge Invoice in Quickbooks
 It’s not uncommon for business owners to invoice their customers or clients at different intervals. While some business owners collect payment during the transfer of the goods or services, others wait until later. When accepting payment after the delivery of goods or services, you should consider using a delayed charge invoice. As the name suggests, this special type of invoice “delays” the charge, allowing customers or clients to pay for their purchase at a later date. To learn more about delayed charge invoices and how to create them using the Quickbooks accounting software, keep reading.
You can easily create a delayed charge invoice in Quickbooks Online — the cloud-based version of Intuit’s accounting software — by logging in to your account, clicking the (+) menu at the top of the screen and choosing “Delayed Charge” under the column for “Customers.” From here, you’ll need the select to whom you want send the delayed charge invoice. If the customer isn’t listed in your Quickbooks account, you’ll need to add him or her by clicking the “+Add new” button. While adding a new customer may sound tedious, you don’t have to enter all the information for the customer. Rather, creating a delayed charge invoice only requires you to enter the customer’s name. You can go back into your Quickbooks account later to update the customer’s other information.
After selecting the customer, Quickbooks will prompt you to enter a date for the purchased product or service. Keep in mind that this is not the “due date” for the invoice. This is the date on which the customer agreed to purchase the product or service. Double check the date to ensure it’s correct, at which point you can proceed to the next step. Next, you’ll need to enter the product or service that you sold to the customer. Like customers, Quickbooks allows you to select the product or service from a drop-down menu. And if the product or service isn’t listed in your Quickbooks account, you’ll need to add it by clicking the “Add” button.
You’re almost finished. Now comes the process of choosing an “Income Account” in the “Product or Service Information” field. Finally, enter a price for the product or service, followed by clicking “Save and Close” to complete the process. Once finished, you’ll have a delayed invoice ready for the customer or client.
Did this tutorial work for you? Let us know in the comments section below!

How to Record a Bounced Check Payment in Quickbooks
 When accepting checks as a form of payment for your business’s products or services, you run the risk of having the check bounce. If the customer doesn’t have enough funds in his or her bank account to cover the cost of the purchased product or service, the check will bounce. Typically known as non-sufficient funds (NSF), it’s a common occurrence encountered by countless businesses. To prevent a bounced check from negatively impacting your business’s financial records, though, you’ll need to record it. If you use Quickbooks, you can easily record a bounce check payment in just a few simple steps.
Bounced Check Feature
Quickbooks Desktop actually has a bounced check feature that’s designed specifically for recording bounced check payments. To use this feature, log in to your Quickbooks account and click Customers > Customer Center > Transactions > Received Payments. From here, you’ll see a list of all payments that your business has received. Scroll through the list until you see the payment associated with the bounced check, at which point you can double-click it to record it as an NSF.
There are a few more steps to recording a bounced check using this feature, however. Once you’ve marked the customer’s payment as an NSF, you’ll need to access the “Receive Payments” window, from which you can click the “Record Bounced Check” option. Keep in mind that you can only record a bounced check if the check is not waiting to be cleared. Rather, this feature is only available to checks that have been cleared by the respective bank, even if the clearing resulted in an NSF.
Manually Recording Bounced Check
You can also record a bounced check payment in Quickbooks manually. This is a slightly more tedious process, but it’s still a viable solution for handling these bad payments. To record a bounced check manually, you’ll need to create an account as well as an item to track the NSF. Next, you must record the NSF that your business incurred from its bank. Finally, you can reverse the customer’s original payment so that it doesn’t affect your accounting records. While optional, you can also send the customer an invoice for the NSF fee charged by your bank. If you don’t send a customer an invoice for this fee, your business will incur this expense, which is usually around $30 or $40.
Did this tutorial work for you? Let us know in the comments section below!
How to Record Cash Sales in Quickbooks
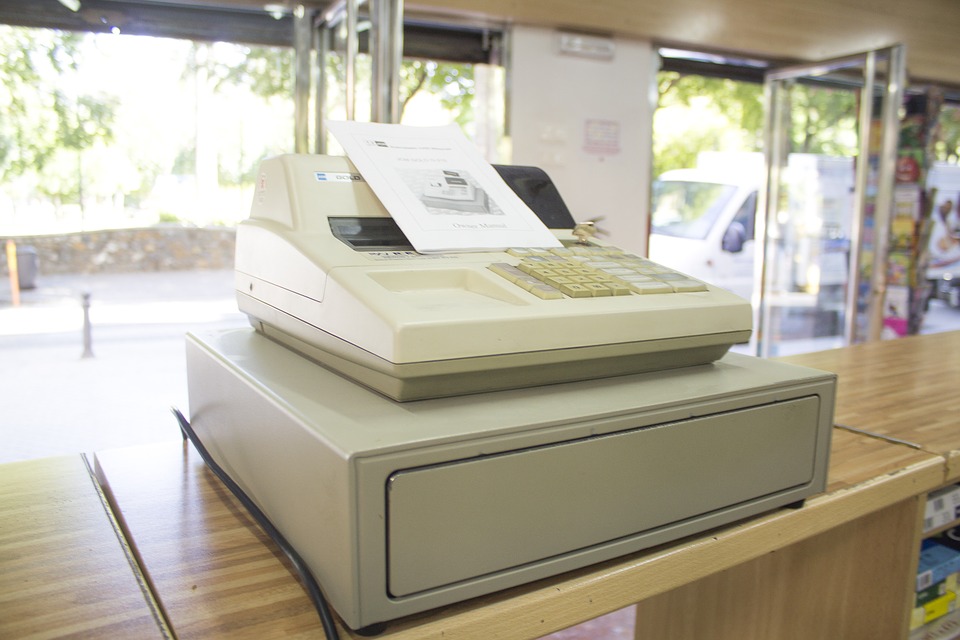
 In recent decades, credit cards have become the preferred method of payment among consumers. When buying a product or service, most consumers prefer to pay using a credit card. But while it’s the most common type of payment, it’s not the only option available for consumers. Many consumers still pay using cash. As a business owner, you must properly record these cash sales so that they won’t throw off your financial records. Using the Quickbooks accounting software, you can easily record cash sales in just a few simple steps.
Handling cash transactions in Quickbooks requires a different approach than credit card, debit card and check transactions. When you receive payment from a customer, you typically record the payment immediately when you receive payment. If a customer pays using cash, however, you can wait until the end of the day to record the payment. This involves creating a Sales Receipt template for each day during which you received at least one cash payment from a customer.
To create a Sales Receipt template in Quickbooks, you’ll also need to create a Products/Services with various account types, including sales category, sales tax, overage/underage and cash. Basically, you want to record all of the sales as positives and all the cash payments that you’ve received from customers as negatives. At the end of the day, you can compare these numbers to ensure that the balance equals zero. The total amount of your positives should be the same as your negatives. If your positives for the day are higher than your negatives, this indicates an underage — meaning your cash register is short and you didn’t receive all the payments from your customers for the day.
A typical sales receipt in Quickbooks lists the sales amount, sales tax and cash payment. The sales amount and sales tax are positive, whereas the cash payment amount is negative. When you add the items together, they should equal zero. If it’s not zero, you made an error and should go back to try and identify it.
After creating a sales receipt, go back to your Quickbooks account and access the “Undeposited Funds” section, at which point you can record the deposit amount. This, of course, is the amount of money from the cash payment that you deposited into your back account. For more help on creating recurring templates, including Sales Receipt templates, in Quickbooks, check out this Intuit article.
Did this tutorial work for you? Let us know in the comments section below!
What Is a Billable Expense in Quickbooks?
 When using Quickbooks to keep track of your business’s financial records, you may come across “billable expense.” Some business owners assume that billable expenses are any business-related expense, but this isn’t necessarily true. It’s a special type of expense, and recording it requires a different method. So, what is a billable expense, and how to find them using Quickbooks?
Overview of Billable Expenses
A billable expense is a product or service that you, as the business owner, purchases on behalf of a customer or client for the purpose of performing work. It’s called a “billable expense,” because it’s just that: an expense that you can bill. You initially incur the expense because you purchase it on behalf of the customer or client. Later, however, the customer should send you payment for the amount of the expense.
It’s important for business owners to use billable expenses if they purchase products or services on behalf of their customers or clients. Failure to bill customers or clients for the amount of the expense means that your business will end up paying more money, essentially giving the customer or client the purchased item for free. As a business owner, you must collect payment where payment is due, and that includes when purchasing products or services on behalf of your customers or clients — a process that’s easily checked using billable expenses.
How to Access Billable Expenses in Quickbooks
In Quickbooks, you can mark bills, expenses and even checks as billable. Once marked as billable, you’ll have the option of attaching the expense to an invoice. So, if you want to create a billable expense for a customer, simply create a bill or expense, mark it as billable, and attack it to invoice for the appropriate amount.
If you’re having trouble using billable expenses in Quickbooks, you should check to make sure this feature is turned on. This is done by logging in to your Quickbooks account and clicking “Account and Settings.” Next, click “Expenses,” followed by the pencil icon below “Bills and expenses.” You should see a small box labeled “Track billable expenses and items as income.” Click it so that it creates a check mark box, after which you can click “Save” to complete the process. Quickbooks will now allow you to create billable expenses for your customers or clients.
Have anything else that you’d like to add? Let us know in the comments section below!
How to Modify a Sales Receipt That’s Been Deposited in Quickbooks
 Do you need to modify a sales receipt that you’ve already deposited into your bank account? In Quickbooks, you can’t edit or otherwise modify a sales receipt after depositing it. However, there’s a simple workaround that will allow you to make changes to it. This involves removing the sales receipt, followed by editing it, and then adding it back to your deposit. It may sound like a lot of work, but it’s actually relatively easy and painless. Here’s how to modify a sales receipt in Quickbooks that you’ve already deposited.
First and foremost, you’ll need to remove the sales receipt from the deposit. This is done by logging in to your Quickbooks account and clicking the gear icon at the top of the page, followed by “Chart of Accounts.” After locating the deposit account, click the “View register.” Next, locate the deposit with the sales receipt and click “Edit.” You can then click the check mark to remove the transaction from the deposit. Complete the process by clicking “Save,” followed by “Yes.”
After removing the sales receipt from the deposit, you’ll need to edit the payment. Go back to the home screen of your Quickbooks account and click the gear icon, followed by “Chart of Accounts” again. After locating the deposit account, click “View register.” Next, locate and open the deposit. You should see a “Received From” field, in which you can choose the customer whom paid you the money. Clicking the customer’s name will open the “Sales Receipt” window, and here you can modify the payment. When finished, click “Save” and “Yes” to complete the changes.
The final step is to replace the sales receipt in the deposit. Remember, the entire process of modifying a sales receipt that you’ve already deposited involves removing the sales receipt from the deposit, editing it, and then adding it back. With your sales receipt edited, it’s time to add it back. Go back to your “Chart of Accounts” and “View register,” and choose the deposit. From here, you can click “Edit” to add it back. When finished, click ‘Save and Yes,” after which the newly corrected deposit should now appear in your account. Keep in mind that you may see the letter “R” next to your deposit. If present, this indicates that it has been reconciled.
Have anything else that you’d like to add? Let us know in the comments section below!
What Is the Audit Log in Quickbooks?
 If you use Quickbooks for your business’s accounting needs, you may come across the term “audit log” when using the software. While some business owners are familiar with this feature, others are not. And unless you know what exactly the audit log is, you won’t be able to take advantage of this Quickbooks feature. So, what is the audit log in Quickbooks, and how do you use it?
Overview of the Audit Log
The audit log is a Quickbooks feature that displays a list of all changes made to your Quickbooks account. Whenever you receive a payment from a customer, make a payment to a vendor, create a new document or perform any other change, Quickbooks creates a record of it in an audit log. You may never need to view your business’s audit log. But if a problem arises with your books, you can use this feature to see a list of all changes made to your account. As a result, the audit log is an invaluable accounting feature for business owners that can be used to find problems within a business’s financial records.
How to View the Audit Log in Quickbooks
You can view the audit log in just a few simple steps. If you use Quickbooks Online — the cloud-based version of Intuit’s accounting software — log in to your account and click the gear icon at the top of the page, followed by “Audit Log.” You can then click the drop-down menu to select the user, date and event. After choosing your desired settings for the audit log, click Apply. Quickbooks Online will then create a report containing all the changes that you or someone else made to your business’s financial records.
Audit log is also offered in the Quickbooks Desktop, but you’ll need to follow a different set of steps to access it. For Quickbooks Desktop, log in to your account and select Reports > Accountant and Taxes > Audit Trail. Quickbooks will then bring a new menu for the Audit Trail. From here, you can choose your desired settings to customize the report, followed by pressing “OK.” Quickbooks will create a report based on these settings, allowing you to see all changes made to your business’s financial records. Whether you use Quickbooks Online or Quickbooks Desktop, you can run an audit log in just a few easy steps as described here.
Have anything else that you’d like to add? Let us know in the comments section below!

Closing Your Accounting Records for the End of the Year in Quickbooks
 With the year coming to a close, many business owners are scrambling to prepare their accounting records. January 1 marks the end of one tax period and the beginning of a new one. You’ll be required to pay tax on all your business’s profits, as well as any capital gains, for the previous year. If you use the Quickbooks accounting software, however, you can easily close your accounting records for the end of the year so that they don’t affect your records for the new year.
The easiest way to close your books in Quickbooks is to set a password-protected closing date. You can set the previous year as the date, meaning that neither you nor anyone else can modify the records for the previous year unless they log in using your specified password. Keep in mind that this feature is optional, and business owners aren’t required to set a password-protected closing date. Quickbooks Desktop makes automatic adjustments to records at the end of the year to prepare the business owner for the new period. But setting a password-protected closing date helps to preserve records from the previous year so that workers or accountants don’t accidentally make changes to them.
To set a password-protected closing date, log in to your Quickbooks Desktop account and access Edit > Preferences > Accounting. Next, click “Company Preferences,” followed by “Set Date/Password.” You can then choose your closing date — the date on which no more changes can be made without a password — as well as a password. After entering this information, click “OK” for “Set Closing Date and Password” and “OK” for “Preferences.”
In addition to setting a password-protected closing date, you may also want to review changes made to your business’s financial records in the previous year. Quickbooks has a built-in feature for this purpose. To view these changes, log in to your Quickbooks Desktop account and click Reports > Accountant & Taxes > Closing Data Exception Report. Choose your preferences and run the report, after which you’ll see a list of all changes made to your business’s records for the specific year or fiscal period.
Closing your books at the end of the year is important, as it preserves your business’s financial records. Assuming you use Quickbooks Desktop, you can easily close your books by setting a password-protected closing date. You can still technically modify your records from the previous year, but you’ll need to use a special password to do so.
Have anything else that you’d like to add? Let us know in the comments section below!

How to Run a Retained Earnings Report in Quickbooks
 As most business owners already know, retained earnings are the profits invested back into a business. When a business generates profits, it may spend those profits on products, services or payroll to further grow and reach new customers. The money invested for this purpose is classified as retained earnings. While most business owners are familiar with the general concept of retained earnings, many don’t know how to view this financial metric in their books. Assuming you use Quickbooks, however, you can run a retained earnings report.
When viewing your business’s balance sheet in Quickbooks, you won’t see retained earnings. This is because retained earnings is considered a rollover from all your business’s past years of profit or loss. Therefore, the correct way to view your business’s retained earnings is to run a “Profit and Loss” report.
To run a “Profit and Loss” report in Quickbooks, log in to your Quickbooks account and click “Reports” from the menu on the left-hand side. In the “Go to” field, select “Profit and Loss,” followed by “Profit and Loss” report. You should see a new menu for the “Profit and Loss” report appear. Click the drop-down menu next to “Report period,” and select “All Dates.” Next, click “Run Report” so that Quickbooks will create a report for your business’s profits and losses. Once Quickbooks finishes with the report, choose “Net income” for the amount.
Assuming you followed these steps correctly, you’ll see a “Profit and Loss” report that includes all transactions that affected your business’s finances. Of course, this method shows your profits and losses from all previous years. You can run a “Profit and Loss” report by year by making a few changes. This is done by choosing “Reports” from the main main, followed by “Profit and Loss” in the “Go to” field. However, you’ll need to click “Customize” in the upper-right corner of the report menu, followed by “Rows/Columns.” Next, click the “Columns” drop-down menu and choose “Fiscal Years” or “Calendar Years.”
It’s a good idea to run a “Profit and Loss” report on a regular basis. Using this report, you’ll be able to see your business’s retained earnings, thereby giving you a better understanding of your business’s financial health. Without this information, you won’t be able to make educated decisions regarding your business’s finances and its future.
Did this tutorial work for you? Let us know in the comments section below!

What Is Progress Invoicing in Quickbooks?
 When using Quickbooks to keep track of your business’s financial transactions, you’ll probably come across the term “Progress Invoicing.” This billing feature works like traditional invoices but with one major difference: Progress Invoicing is used to send many small invoices to a customer rather than a single invoice for 100% of the money owed. It’s called Progress Invoicing because it invoices the customer based on the progress of the work or job purchased. To learn more about Progress Invoicing and how to use this feature in Quickbooks, keep reading.
The purpose of Progress Invoicing is to bill customers incrementally rather than all at once. When a business sells a service to a customer, it may send the customer an invoice requesting payment. From landscapers and painters to advertising firms and doctors, countless businesses use invoices to bill their customers and collect payment for their services or goods sold. And while you can always use the traditional invoicing method of sending customers a single invoice, Progress Invoicing is a viable alternative that’s particularly useful for jobs that require a significant amount of time to complete.
Not all businesses need to use Progress Invoicing. While there’s no single right way to use it, Progress Invoicing is best used to bill customers for work that’s completely in incremental stages. A business-to-business (B2B) advertising company, for example, may use this feature to send its customers partial bills at different stages of their service. When one segment of the company’s advertising service has been completed, it may send the customer a partial invoice. And after the company completes the next segment of its service, it may send the customer a second partial invoice. There’s no limit to the number of partial invoices that you can send using Progress Invoicing. The most important thing, however, is that you invoice customers for the appropriate amount. In other words, don’t overbill your business’s customers by sending them too many partial invoices.
You can enable Progress Invoicing in Quickbooks Online by logging in to your account and clicking the gear icon at the top of the page. From here, click Account > Settings > Sales > Progress Invoicing. You’ll then need to click the pencil icon, followed by choosing “Create multiple partial invoices from a single estimate.” To complete the process, click “Save,” followed by “Done.” Quickbooks Online will now allow you to create an invoice using one of your saved estimates.
Have anything else you’d like to add? Let us know in the comments section below!

What Are Projects in Quickbooks?
 When using Quickbooks Online to record your business’s financial transactions, you may come across projects. Available exclusively in Quickbooks Online Plus — the premium version of Intuit’s cloud accounting solution — projects is designed to help organize your financial transactions and reports. Using it, you can curate all work-related information into a single portal, link invoices and expenses to their respective project, view open jobs to analyze costs, and much more. Projects is a versatile feature that’s sure to have a positive impact on your business’s bookkeeping efforts.
So, how do you use projects in Quickbooks? To take advantage of this feature, you’ll need to log in to your Quickbooks Online Plus account, followed by clicking the gear icon at the top of the page and choosing “Accounts and Settings.” Next, click “Advanced,” followed by “Turn on projects.” Sorry if you were expecting more, but that’s all it takes to enable projects in Quickbooks.
Of course, you won’t see this option if you’re using a different version of Quickbooks. Only Quickbooks Online Plus supports projects. All other versions of Intuit’s accounting software do not. You can upgrade your Quickbooks Online subscription to the Plus version by logging in to your account and clicking the gear icon, followed by “Account and Settings.” Next, choose “Billing and Subscription,” and then “upgrade.” From here, you can choose the version of Quickbooks that you’d like to upgrade to. After selecting “Plus,” double check the information to make sure it’s correct, followed by choosing “Done.” to complete the process. Once you’ve upgraded to Quickbooks Online Plus, you can go back into your account and proceed to enable to projects using the steps previously mentioned.
After enabling projects in your account, you should create your first project by logging in to Quickbooks and selecting “Projects” from the menu on the left-hand side. From here, choose “New project,” and then give your project a name. You’ll want to select a client for the project, and while optional, you can add a memo or note to the project. After completing this information, click “Save” to save your new project.
Keep in mind that you can add invoices to projects. This is done by choosing “Add to project,” followed by “Invoice.” Quickbooks also allows you to add transactions to projects. To add a transaction to a project, choose “Add to project,” followed by “Expense,” “Time,” “Bill” or “Purchase Order.”
Did this tutorial work for you? Let us know in the comments section below!
