

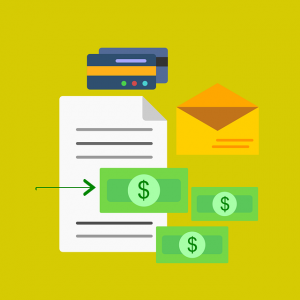
Positive vs Negative Cash Flow: What’s the Difference?
 Cash flow offers an accurate representation of your business’s profitability. Regardless of what products or services your business sells, you can use this metric to determine whether your business is succeeding or failing at generating profits. Cash flow, however, can have a positive or negative value. For effective cash flow management that helps your business succeed, you must understand the differences between positive and negative cash flow.
What Is Positive Cash Flow?
Positive cash flow means your business received more cash — or other assets for than matters — during a given period than what it spent or incurred during the same period. All businesses have incoming and outgoing cash. Incoming cash refers to payments from customers or clients as well as money generated from other business-related activities, such as investing. Assuming your business’s incoming cash is greater than its outgoing cash, the value of its cash flow will be positive.
What Is Negative Cash Flow?
Negative cash flow, on the other hand, means your business spent or incurred more money during a given period than what it generated or otherwise received. A negative cash flow is concerning because it indicates your business is spending more money than it’s making. If your business has some cash reserves, it may be able to weather a short period of negative cash flow. Eventually, though, it will need to change its practices to achieve positive cash flow. Allowing negative cash flow to go unchecked for an extended period will quickly drain your business’s finances. Negative cash flow, in fact, is a common reason why small businesses fail.
Tips to Improve Your Business’s Cash Flow
Even if your business’s cash flow is negative, there are ways to turn it around. For example, you may be able to improve your business’s cash flow by switching utility companies. If your business operates out of an office or building, shop around for different utility providers. With a little luck, you may find a new utility provider that offers a lower price than your business’s current provider.
Another way to improve your business’s cash flow is to lease equipment rather than buying it. When you lease equipment, you’ll essentially pay to use it. Therefore, it’s almost always cheaper in the short term to lease rather than buy equipment. The only downside is that you won’t own the equipment when you lease it. You can also send invoices to customers and clients more quickly. The sooner a customer or client pays, the better.
Have anything else that you’d like to add? Let us know in the comments section below!

Intuit Launches New Quickbooks Banking Feature Known as Quickbooks Cash
 Intuit is constantly updating Quickbooks with new features to help small- and medium-sized businesses (SMBs). One of the latest features added to Quickbooks is a multipurpose banking feature known as Quickbooks Cash. What Is Quickbooks Cash exactly, and how do you use it?
What Is Quickbooks Cash?
Originally unveiled in August 2020, Quickbooks Cash is a new banking feature that’s designed to help SMBs better manage their money. Among other things, it features a high-yield savings account, a budgeting tool and a machine-learning cashflow prediction tool. If you sign up for a business account with Quickbooks Cash, you can also take advantage of free deposits. Quickbooks Cash even comes with a debit card that you can use to make purchases, both locally and online, using your business account.
“QuickBooks Cash delivers what current business accounts don’t — a banking experience that enables small businesses to accept payments, pay teams and vendors — with automatic reconciliation for easy financial management. Companies that have more working capital can take advantage of more opportunities,” said Intuit when announcing Quickbooks Cash.
Quickbooks Cash is designed to integrate seamlessly into Quickbooks Online. You can use it with the cloud-based accounting software’s payments and other core accounting features.
How to Get Started With Quickbooks Cash
To get started with Quickbooks Cash, you’ll need to sign up for an account. You can apply for a Quickbooks Cash account by following this link. Once approved, you’ll receive your debit card in the mail after about three to five business days.
Upon getting approved for Quickbooks Cash, you’ll need to connect a bank account to your new Quickbooks Cash account. Connecting these two accounts will allow you to transfer money into and out of your Quickbooks Cash account.
You can connect a bank account to Quickbooks Cash by clicking the “Cash Flow” menu and choosing “Transfer money” in the new “Quickbooks Cash” section. Next, choose the “Transfer in.” option. You will then need to enter the name of your bank in the “Account Type” field, after which you can click”Next.” After entering the name of your bank, you’ll be required to enter the account number and routing number of the account in the appropriate field. When finished, click “Next,” followed by “Sounds food.” In the next few days, Quickbooks will make two small deposits into your account, which you’ll need to confirm to verify your account and complete the setup.
What are your thoughts on Quickbooks Cash? Let us know in the comments section below!

How Does Accounts Receivable Financing Work?
 A bank loan isn’t the only way you can finance your business’s operations. There are alternative financing options available, one of which is accounts receivable financing. If your business uses invoices to collect payments from its customers or clients, you can use accounts receivable financing. With that said, you might be wondering how this alternative financing method works exactly.
The Basics of Accounts Receivable Financing
Accounts receivable financing involves tapping into your business’s unpaid invoices for financing. There are private financing companies that specialize in accounts receivable financing. They will either buy your business’s unpaid invoices — typically at a slightly lower rate than their face value — or they will loan you money using your business’s unpaid invoices as collateral.
Under the former option, you’ll obtain money by selling unpaid invoices to a private financing company. The financing company will essentially buy your business’s unpaid invoices. Under the latter option, you’ll obtain money in the form of a loan by using your business’s unpaid invoices as collateral. You’ll still have to pay back the loan, but you’ll get immediate cash that you can use to finance your business’s operations. There are the two basic methods used for accounts receivable financing.
Advantages of Accounts Receivable Financing
Many businesses struggle to collect payments from their customers or clients. With accounts receivable financing, you don’t have to waste time or resources trying to collect payments. You can simply sell the unpaid invoices to a private financing company.
Accounts receivable financing is also faster than traditional financing methods, such as bank loans. It can take well over a month for a bank to approve your business for a traditional loan. In comparison, private financing companies may approve your application for accounts receivable financing in just a few weeks. If your business is in dire need of immediate cash, accounts receivable financing can be an attractive choice for this reason.
Disadvantages of Accounts Receivable Financing
Accounts receivable financing, of course, is only an option if your business uses invoices. If customers or clients pay upfront, you won’t be able to use this alternative financing method.
If you intend to sell your business’s unpaid invoices, it’s important to note that you won’t get the full value for them. Private financing companies make money by buying unpaid invoices at a lower value.
Have anything else that you’d like to add? Let us know in the comments section below!

How to View the Transaction Journal in Quickbooks
 Business-related transactions often consist of multiple debits and/or credits. When using Quickbooks, however, you can look at all the debits and/or credits associated with a transaction. Quickbooks features a Transaction Journal that’s designed specifically for this purpose. It provides more information about transactions that’s not available simply by viewing the transactions themselves.
What Is the Transaction Journal?
The Transaction Journal is a report in Quickbooks Desktop that contains detailed information about your business’s recorded transactions. According to Intuit, it was originally designed to help professional accountants with their daily accounting tasks. The Transaction Journal revolves around the dual-entry accounting method. Whether you’re a professional accountant or a business owner, though, you can take advantage of the Transaction Journal to gain a better understanding of your recorded transactions.
Using the Transactional Journal, you’ll have an easier time finding transactions that have an incorrect balance. You can also use the Transaction Journal to identify erroneous entries for your recorded accounts.
How to View the Transaction Journal
You can view the Transaction View in one of several ways. After accessing the transaction screen for an invoice, receipt or other transaction, click the “Reports” option under the transaction toolbar and choose “Transaction Journal.” From here, you’ll see all the debits and credits associated with the open transaction.
You can also view the Transaction Journal by clicking the “Reports” menu under the main “Reports” menu and choosing “Transaction Journal.”
Because it’s such a popular feature, Quickbooks has a keyboard shortcut available for the Transaction Journal. If you’re using a Windows PC, press the Ctrl+Y keys. If you’re using an Apple Mac, click the Cmd+T keys. Performing the appropriate keyboard shortcut will automatically launch the Transaction Journal.
Breaking Down the Transaction Journal
When viewing the Transaction Journal, you’ll notice several different options. There’s the “Accrual only” option, which is designed to show the total value of all posts associated with the transaction. There’s also the “Current form” option, which is designed to only show the transaction form without any additional information like dates. You can also choose the “Customizable” option when viewing the Transaction Journal,” which as you may have guessed, allows you to customize the Transaction Journal with various information. Other options available in the Transaction Journal include “Sort order,” “Non-posting” and “Source & targets.”
Did this tutorial work for you? Let us know in the comments section below!

What Are ACH Payments in Quickbooks?
 Offering a limited number of payment options is a surefire way to harm your business’s sales revenue. If a customer doesn’t see his or her preferred payment method listed, the customer may look elsewhere for a product or service to buy. You can expand your business’s payment options, however, by enabling ACH payments in Quickbooks. Quickbooks supports ACH payments, and when compared to credit card payments, they have a significantly lower processing fee.
The Basics of ACH Payments
An acronym for “Automated Clearing House,” ACH is a type of bank-based payment. It’s used to send and receive money between two bank accounts. Assuming both banks support ACH payments, one account can send money to another payment. The sending bank will initiate the ACH transfer, and assuming all the details are correct, the receiving bank will accept it.
Benefits of ACH Payments
ACH payments offer several advantages, one of which is ease of tracking. Since ACH payments are processed between the two respective banks, they create a digital paper trail. You don’t have to worry about keeping track of receipts. Rather, each ACH payment will be automatically recorded in your bank account.
Perhaps the greatest benefit of ACH payments is their low cost. You’ll incur relatively high processing fees with credit card and other traditional payment methods. ACH payments, on the other hand, have substantially lower processing fees. Some banks even support free ACH payments for their customers. Regardless, your business will save money when accepting ACH payments from customers as opposed to other payment methods.
Using ACH Payments in Quickbooks
If a customer wants to pay for your business’s goods or services using ACH, you’ll need to enter his or her bak information. This is done by selecting the “Enter Bank info” option, at which point you can complete the fields for “Account Number,” “Account Type,” “Routing Number” and “Name.” It’s a good idea to tick the option for “Use this account information in the future,” so that Quickbooks will save the customer’s information.
You’ll also need to acquire authorization from the customer to receive his or her ACH payment. To do this, choose the “signed authorization” option, which should print an authorization form that you can provide to the customer. After the customer has signed and returned the form, select the option for “I have signed authorization.” Finally, click the “Save” option to complete the process.
Have anything else that you’d like to add? Let us know in the comments section below!

What Is Multicurrency in Quickbooks and How Does It Work?
 Does your business have a multinational presence? If so, you’ll probably receive payments in foreign currencies. Some customers may pay in USD, whereas others may pay in a different currency. When using Quickbooks, you can track and record all types of currencies using a feature known as Multicurrency.
Overview of Multicurrency
Multicurrency is a feature in the Quickbooks accounting software — both desktop and online versions — that allows you to track multiple currencies. When enabled, you can assign the appropriate currency to various accounts, including customers, vendors, banks, credit cards, accounts receivables, accounts payable and more. When you record a transaction from one of these accounts, Quickbooks will automatically use your specified currency.
How to Turn on Multicurrency
You can turn on Multicurrency by logging in to Quickbooks and clicking “Preferences” under the “Edit” menu on the home screen. From here, you should see an option for “Multiple Currencies.” Clicking this option will bring up a new set of options. You can then click the “Company Preferences,” followed by “Yes, I use more than one currency.” Finally, select your home currency under the drop-down menu. Once complete, save your changes to finish the setup. Multicurrency should now be enabled in your Quickbooks account.
Using Multicurrency: What You Should Know
With Multicurrency turned on, you can now assign the appropriate currency to your business’s customers, vendors or other accounts. Keep in mind, however, that you’ll have to create a new profile for each account. All your existing accounts will automatically use your specified home currency.
To assign a new currency to a customer, click the “Customers” menu on the home screen and select “Customer Center.” Next, choose “New Customer:job” in the “Customer Center.” You can then select the “New Customer” option. To assign a currency to the customer, simply choose the currency from the drop-down menu of available options. When finished, click “OK” to complete the process.
You’ll probably encounter some new fields after activating Multicurrency. Quickbooks, for example, will create a “Currency” field that shows up in your Chart of Accounts. The “Currency” field contains a list of your added currencies. You’ll also see a “Bank and Credit card registers” account, which shows up in payment headings. This field denotes the currency used for the respective payment.
Have anything else that you’d like to add? Let us know in the comments section below!

How to Pay Sales Tax in Quickbooks
 Does your business collect sales tax from its customers? With the exception of Alaska, Oregon, New Hampshire, Delaware and Montana, most states have a predetermined sales tax. It typically ranges from 2% to 6%, meaning you’ll have to charge customers this additional amount on top of the products or services that they purchase. After collecting sales tax, though, you’ll need to send it to your state’s tax agency. Quickbooks can help you pay sales tax by providing all the necessary records.
Steps to Paying Sales Tax in Quickbooks
To pay sales tax in Quickbooks, go to the homepage and choose “Sales Tax” under the “Vendors menu,” followed by “Pay Sales Tax.” Under the “Pay From Account” menu, choose the bank account from which you want to pay the sales tax. Keep in mind that you’ll only see your business’s bank accounts listed under this menu. You won’t see credit card or other financial accounts.
Next, double-check the field labeled “Show sales tax due through” to ensure it’s correct. If the date is wrong, you’ll need to change it before proceeding to the next step. You should also use this opportunity to double-check the “Starting Check No.” field. This field represents the check number for which you’d like to pay the sales tax.
In the main section, you’ll see a list of all your business’s sales taxes as well as the tax organization for which they are due. Each line in the main section should list an item, vendor (tax organization), amount due and amount paid.
Finishing Up
If all the information looks correct, you can pay your business’s sales tax by clicking the “Pay All Tax” button. This option will pay all the sales taxes your business owes as indicated in the main section. With that said, Quickbooks doesn’t require you to pay sales tax in full. You can make partial payments by clicking the “Amt Paid” cell and entering your desired payment amount.
You can also choose to print or write checks for sales tax payments. To do this, click the box labeled “To be printed,” at which point Quickbooks will place a checkmark in it. To complete the process, click the “OK” button. Quickbooks will then either process your payment or print out the documents so that you can manually pay your sales tax.
Have anything else that you’d like to add? Let us know in the comments section below!

An Introduction to Undeposited Funds Accounts in Quickbooks
 You don’t have to manually deposit each customer’s payment into your business’s account. Assuming you use Quickbooks, you can take advantage of the accounting software’s undeposited funds feature. With this feature, you can group payments together, allowing for faster and more efficient deposits. What is undeposited funds exactly, and how does it work?
What Is Undeposited Funds?
Undeposited funds is a feature in Quickbooks that allows you to combine, as well as hold, multiple payments before depositing them into your business’s bank account. Depending on the type of business that you operate, you may receive dozens or even hundreds of payments per day. Instead of depositing each of these payments into your business’s account separately, you can deposit them all simultaneously as a group by using undeposited funds.
Why should you use undeposited funds exactly? Normally, banks don’t group deposits together. For instance, if you deposit three $400 payments — meaning three customers paid you $400 each — your business’s bank would record the transaction as a single $1,200 deposit. As a result, you’ll have to combine the payments in Quickbooks so that it matches the transaction recorded by your business’s bank. Undeposited funds allows you to do this by grouping the payments together.
Getting Started With Undeposited Funds
To get started with undeposited funds, log in to Quickbooks Desktop and click the “Edit” menu, followed by “Preferences.” You can then click the “Payments” option under the menu to access the “Company Preferences” tab. You should now see an option for “Use Undeposited Funds as a Default Deposit to Account.” Assuming this option is blank, click the box to add a checkmark to it. When finished, click the “OK” button to save your changes.
You can now use the undeposited funds feature to group multiple payments together. This is done by clicking the “Create Sales Receipt” on the homepage of Quickbooks Desktop, followed by selecting a customer under the”Customer” menu. Under the “Deposit to” menu, choose “Undeposited funds.” Quickbooks will then prompt you to enter information about the deposit. After entering all the necessary information, click either “Save & Close” or “Save & New” to complete the process.
Keep in mind, undeposited funds is available in Quickbooks Online as well. The steps required to set it up are slightly different than that of Quickbooks Desktop, but the feature works the same nonetheless.
Have anything else that you’d like to add? Let us know in the comments section below!