

5 Frequently Asked Questions About Fiscal Years in Accounting
 The term “fiscal year” is often used in accounting. Many businesses use it to categorize their financial information. Rather than grouping transactions by the calendar year in which they occurred, they group transactions by the fiscal year in which they occurred. Below are five common questions and answers about fiscal years in accounting.
#1) Are Fiscal Years the Same as Calendar Years?
Fiscal years are not the same as calendar years. A calendar year begins on January 1 and ends on December 31. A fiscal year, on the other hand, can begin and end on different dates. It’s simply a year-long accounting period that’s used to categorize financial information.
#2) How Long Are Fiscal Years?
While they can start and end on different dates, fiscal years are always 12 months long. Like calendar years, they consist of 365 days that span a 12-month period. The main difference is that calendar years always begin on January 1 and end on December 31. Fiscal years, on the other hand, may or may not begin and end on these dates. They may begin on February 1, for instance, and end on January 31st.
#3) Does the IRS Allow Fiscal Years for Tax Filings?
You might be wondering whether the Internal Revenue Service (IRS) allows fiscal years for tax filings? When filing your taxes, you’ll have to submit income and business-related expenses for the given year. The IRS typically requires the use of calendar years for tax filings. With that said, the IRS does make exceptions. To use fiscal years when filing taxes, you’ll have to get approval from the IRS. Only after getting the IRS’s approval can use fiscal years when filing taxes.
#4) What Benefits Does Fiscal Year Accounting Offer?
Fiscal year accounting offers benefits over calendar year accounting. Many businesses use it to delay tax liabilities. It won’t eliminate the burden of taxes. Rather, fiscal year accounting allows businesses to postpone the date on which tax liabilities must be paid.
#5) Can You Switch From Calendar Year to Fiscal Year Accounting?
Even if you’ve used calendar year accounting in the past, you may be able to switch to fiscal year accounting. With that said, switching to fiscal year accounting can be difficult. It also requires the approval of the IRS. For these reasons, you may want to continue using calendar year accounting, assuming you’ve already been using it.
Have anything else that you’d like to add? Let us know in the comments section below!

How to Schedule Automatic Backups in Quickbooks Desktop
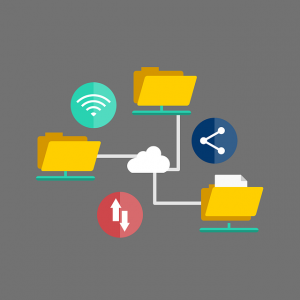
 Data loss can prove disastrous to your business. If you lose accounting data, for example, you may have to rebuild it from the ground up by reviewing all of your bank and financial records. With Quickbooks Online, though, you can take advantage of automatic backups to protect against data loss. Automatic backups will ensure that your business’s accounting data is regularly and automatically backed up.
What Are Automated Backups?
Automated backups are exactly what they sound like: backups that are created automatically and without manual intervention. They are available in all versions of Quickbooks Desktop. Whether you use Quickbooks Desktop Pro Plus, Premier Plus or Enterprise, you can take advantage of this feature.
Quickbooks Desktop supports manual backups as well. Both automated and manual backups involve copying your company file. Your company file, of course, contains all of your business’s accounting data. While they both serve the same purpose of backing up accounting data, only automated backups are performed automatically.
Scheduling Automated Backups: What You Should Know
How do you schedule automated backups in Quickbooks Desktop exactly? The option to schedule automated backups is available under the “File” menu. After loading Quickbooks Desktop and switching to single-user mode, go to the “File” menu and select “Back Up Company,” followed by “Create Local Backup.”
You should see a new window after selecting “Create Local Backup.” In this window, choose the option for “Local Backup” and click “Next.” You can then choose the location for the backup. You’ll be able to navigate to your computer’s storage drive while choosing the specific directory to which the backup will be saved.
You’ll have to verify the backup file before proceeding. This is done by selecting the “Complete verification” option. When selected, Quickbooks Desktop will test the backup file. After the verification process has finished, select the option for “Save it now and schedule future backups.” Quickbooks Desktop will then create a backup while also allowing you to schedule additional backups for the future.
Quickbooks Desktop will display a confirmation message notifying you that your backups have been scheduled for the specified date. Of course, you can still create backups manually. Automated backups are simply an alternative solution. With automated backups, you can rest assured knowing that Quickbooks Desktop will back up your company file on the specified date. You can even schedule automated backups for intervals, such as every Monday or every Friday.
Have anything else that you’d like to add? Let us know in the comments section below!

Express vs Custom Installation for Quickbooks Desktop: What’s the Difference?
 Unless you plan on using a third-party hosting service, you’ll have to install Quickbooks Desktop on your computer. There are third-party service providers that can provide you with access to Quickbooks Desktop. You can sign up for their service, after which you can access Quickbooks Desktop over the internet. Without this service, though, you’ll have to install Quickbooks Desktop locally on your computer.
When installing Quickbooks Desktop on your computer, however, you’ll have two options: express and custom. Both express and custom installation will place the necessary files on your computer so that you can run Quickbooks Desktop. With that said, express and custom installation aren’t the same. They are designed for different purposes and require different steps to perform. What’s the difference between express and custom installation exactly?
What Is Express Installation?
Express installation is exactly what it sounds like: It’s the fastest way to install Quickbooks Desktop. Intuit recommends express installation when installing Quickbooks Desktop for the first time, reinstalling Quickbooks Desktop, or when moving Quickbooks Desktop to a new computer.
When installing Quickbooks Desktop, you should see an option for “Express.” For Express Installation, click this option and select “Next,” followed by “Install.” The accounting software will then install itself on your computer. Once the installation is complete, you can select “Open Quickbooks” to launch the accounting software. Express installation is the fastest, as well as easiest, way to install Quickbooks Desktop.
What Is Custom Installation?
Custom installation, on the other hand, allows you to choose specific options when installing Quickbooks Desktop. It requires a bit more work, and it takes longer than the express installation. Intuit recommends custom installation when hosting company files on a server or when using a multi-user network.
To perform a custom installation, choose “Custom and Network Options” during the installation process. You can then select the option that best describes how you intend to use Quickbooks Desktop.
Unlike with express installation, custom installation allows you to choose where the Quickbooks Desktop files are installed. This is done by selecting “Change the install location.” With this option, you can select the directory on your computer’s storage drive where the files will be installed. Custom installation allows for a higher level of customization than express installation. The downside is that it takes longer and requires a bit more work.
Did this tutorial work for you? Let us know in the comments section below!

What Are Centers in Quickbooks Desktop?
 Quickbooks Desktop has become one of the most popular accounting solutions for businesses. It’s the locally installed version of Intuit’s signature accounting software. Intuit offers Quickbooks Online and Quickbooks Desktop. The former is cloud based, whereas the latter is locally installed. When using Quickbooks Desktop, though, you may encounter Centers. What are Centers in Quickbooks Desktop exactly, and how do you use them?
The Basics of Centers
Centers are portals for specific types of information in Quickbooks Desktop. There are three specific Centers available in Quickbooks Desktop. They consist of the Customers Center, the Vendors Center and the Employees Center.
You won’t find Centers in Quickbooks Online. Rather, this feature is exclusive to Quickbooks Desktop. Centers are designed to help business owners, as well as accounts, access information in Quickbooks Desktop more quickly.
How to Use Centers
By using Centers, you can access information more quickly. You won’t have to click or navigate through a bunch of links. Instead, you can pull up the Center for the information that you are trying to access. To access information about your business’s customers, for example, you can pull up the Customers Center. To access information about your business’s employees, on the other hand, you can pull up the Employees Center.
Using Centers is pretty straightforward. Just pull up the Center for the information that you are trying to access. As previously mentioned, there’s a Center for Customers, Vendors and Employees, each of which contains information about the respective group of users.
When you pull up a Center, you’ll see a list of names in the right-hand column. These are the names of the users added to the Center. For the Customers Center, you’ll see a list of all of your business’s customers in the right-hand column. Selecting a name and clicking the “Transactions” tab at the top will reveal all of the transactions for that user. You can also edit the user’s information in the top-right corner. If the user’s information is wrong or outdated, clicking the pencil icon will allow you to edit it.
In Conclusion
Quickbooks Desktop is loaded with features that can streamline your accounting efforts. One of these features is Centers. There are three Centers in Quickbooks. You can use Centers to quickly view, as well as edit, information about your business’s customers, vendors and employees.
Have anything else that you’d like to add? Let us know in the comments section below!

The Beginner’s Guide to Operating Costs in Accounting
 Operating costs are an essential part of accounting. In the world of business, you have to spend money to make money. Regardless of what your business sells — physical products, digital products, services, etc. — it will incur costs. Failure to track your business’s operating costs may result in decreased cash flow and lower profit margins. Alternatively, your business may fail to turn a profit if it has high operating costs. What are operating costs exactly, and how do you lower them?
What Are Operating Costs?
Also known as operational costs, operating costs encompass all ongoing and expected expenses associated with a business’s operations. Most businesses don’t have a single operating cost. Rather, they have multiple operating costs. Common types of operating costs include rental payments, insurance, product inventory, advertising, utilities and payroll. All of these costs occur on a regular basis. Therefore, they are considered operating costs.
You can calculate your business’s operating costs by adding up its cost of goods sold to its operating expenses. This simple formula will reveal your business’s operating costs. Alternatively, you can use accounting software to calculate your business’s operating costs. Regardless, you can’t ignore operating costs. Operating costs is an essential part of accounting, as it reveals how much your business spends to perform its daily operations.
Operating Costs vs Non-Operating Costs
Operating costs aren’t the same as non-operating costs. Non-operating costs involve expenses that aren’t directly associated with a business’s operations. One of the most common types of non-operating costs is interest fees. If your business has a line of credit or a loan, it will likely incur interest fees. Interest fees allow lenders to make money from loans and lines of credit. When paying interest fees, your business will incur non-operating costs.
How to Lower Your Business’s Operating Costs
There are several things you can do to lower your business’s operating costs. Shopping around, for instance, may offer cost-savings benefits in the form of lower operating costs. If your business has an insurance plan, try contacting several other insurance providers to inquire about a quote. Another provider may offer the same level of coverage at a lower cost. You can also negotiate bulk discounts with vendors. If you order products from vendors, for example, see if they are willing to offer your business a discount on bulk purchases.
Have anything else that you’d like to add? Let us know in the comments section below!

How to Apply Early Payment Discounts in Quickbooks
 Want to encourage more customers to make early payments? If so, you should consider offering them a discount. You can reward customers who make early payments with a discount. Discounts will incentivize customers to make early payments. In Quickbooks Desktop, you can apply early payment discounts such as this in just a few simple steps.
The Basics of Early Payment Discounts
An early payment discount is exactly what it sounds like: It’s a discount that’s given to customers who pay their invoice before the specified deadline. When you send an invoice to a customer, he or she won’t have to pay immediately. Invoices allow customers to pay by a specific date. With early payment discounts, you can reward customers who satisfy their invoices by paying before this date.
Step #1) Pull Up the Customer’s Payment
To apply an early payment discount to a customer in Quickbooks Desktop, you’ll need to pull up his or her payment information. You can find this information by clicking “Customers,” followed by “Receive payments.” You should then see a “Receive Payments” window. In this window, enter the customer’s payment.
Step #2) Choose ‘Discount Info’
Once you’ve entered the customer’s payment, choose “Discount Info.” This option will automatically apply a discount to the customer’s payment. Keep in mind that Quickbooks Desktop automatically applies early payment discounts based on the payment terms and the date on which the customer made the payment. The sooner a customer pays his or her invoice, the higher the discount will be. With that said, you can customize the discount amount. Maybe you want to increase the discount amount, or perhaps you want to decrease it. You can specify the exact amount of the discount in the appropriate field.
Step #3) Choose the Tracking Account
While optional, you may want to track early payment discounts. Quickbooks Desktop supports tracking via custom account names. You can create a custom account that’s designed specifically for early payment discounts. When applying an early payment discount, you can then select this tracking account. All of the early payment discounts assigned to this account will then be curated. You can access the account to view the early payment discounts. Quickbooks doesn’t require the use of a tracking account. You can apply early payment discounts without a tracking account. Nonetheless, using one will result in cleaner records by organizing all of your early payment discounts.
Did this tutorial work for you? Let us know in the comments section below!

What Is Unearned Revenue in Accounting?
 When researching accounting-related terms, you may come across unearned revenue. Revenue is the money that businesses generate from selling their respective goods or services. All businesses generate revenue. With that said, revenue may be considered unearned depending on whether the purchased goods or services have been delivered to the customer.
The Basics of Unearned Revenue
What is unearned revenue exactly? The term “unearned revenue” refers to revenue generated from the sale of goods or services that haven’t been delivered to the customer. A customer may pay for a product or service upfront. Construction services, for instance, often require customers to pay for at least some of the total cost upfront. Earned revenue consists of prepaid revenue such as this. Revenue is simply classified as unearned if the purchase product or service hasn’t been delivered to the customer.
Unearned vs Earned Revenue: What’s the Difference?
Unearned revenue isn’t the same as earned revenue. Also known as accrued revenue, earned revenue is revenue from the sale of goods or services that have been delivered to the customer. In comparison, unearned revenue involves the sale of goods or services that haven’t been delivered to the customer.
Some businesses only generate earned revenue. Local retail stores typically fall under this category. Most local retail stores will transfer their products to their customers at the time of the payment. When a customer pays for a product, the local retail store will exchange the product for money. As a result, local retail stores don’t generate unearned revenue; they only generate earned revenue.
Tips on Recording Unearned Revenue
If your business generates unearned revenue, you’ll need to record it. Both types of revenue need to be recorded. You can record unearned revenue in several ways. One of the easiest ways is to add a credit to one account and a debit to another account. This method is known as double-entry bookkeeping.
You can create a new account specifically for unearned revenue. Upon generating unearned revenue, add a credit for the amount of the unearned revenue to this new account. You can then add a debit to a separate cash account. With double-entry bookkeeping, recording unearned revenue is a breeze. You just need to add a credit to one account and a debit to the other account.
Have anything else that you’d like to add? Let us know in the comments section below!

When to Use Adjusting Journal Entries in Quickbooks
 Not all journal entries are the same. In Quickbooks, you can create journal entries that change the balance of a given account. Known as adjusting journal entries, they’ll directly change the balance of the account for which they are created. When should you use adjusting journal entries exactly? Below are several common instances in which journal entries can prove useful.
Record Bank Fees
You may want to use adjusting journal entries to record fees. Banks charge fees for different reasons. You may incur an overdraft penalty fee, for instance, if you attempt to pay for a product or service without a sufficient amount of money in your bank account. Whether it’s an overdraft penalty fee or any other fee, though, you can record them with adjusting journal entries. Creating an adjusting journal entry for a bank fee will change the account to the appropriate amount.
Record Credit Card Interest
In addition to bank fees, you can use adjusting journal entries to record credit card interest. Nearly all credit cards charge interest on the unpaid balance. You can avoid this interest by paying off your credit cards at the end of each month. Of course, most business owners and consumers will carry at least some balance on their credit cards. For business-related credit card interest, you may want to use adjusting journal entries. Adjusting journal entries will allow you to record both bank fees and credit card interest fees.
Record Deprecation Expenses
You can use adjusting journal entries to record deprecation expenses. Fixed assets lost their value over time. Just because you pay a specific amount of money for an asset doesn’t necessarily mean that it will hold that value indefinitely. Most fixed assets will gradually lose their value. It’s a process known as deprecation. With adjusting journal entries, you can record expenses associated with asset deprecation such as this.
How to Create Adjusting Journal Entries in Quickbooks
You can find create adjusting journal entries by using Quickbooks Online Accountant. From the “Go to Quickbooks” menu, choose your business and select the “+ New” option. You can then choose “Journal entry,” followed by ticking the box for “Is Adjusting Journal Entry?”
On the next screen, you can enter the information for the adjusting journal entry. Clicking “Save and close” will then add the adjusting journal entry while automatically updating the account with which it’s used.
Have anything else that you’d like to add? Let us know in the comments section below!
How to Change a Recurring Payment in Quickbooks
 Does your business sell subscription-based products or services? If so, you may have recurring payments. Recurring payments are common with subscription-based products and services. They consist of regular payments that are automatically deducted from customers’ accounts.
While recurring payments are automated, you can still change certain information about them. Quickbooks Desktop makes it easy to change recurring payments. To learn more about recurring payments, including how to change them in Quickbooks Desktop, keep reading.
What Is a Recurring Payment?
As previously mentioned, a recurring payment is a series of automated payments that’s dedicated from a customer’s account automatically. When a customer subscribes to a product or service, he or she will typically agree to make regular payments over a given period. The subscription may consist of monthly payments, or it may consist of annual payments. Regardless, recurring payments are deducted automatically from the customer’s account. When the billing date rolls around, money will be transferred from the customer’s account to your business’s bank account.
Steps to Change a Recurring Payment in Quickbooks Desktop
How do you change a recurring payment in Quickbooks Desktop exactly? When logged in to Quickbooks Desktop, visit the Online Service Center and choose “Processing Tools,” followed by “Manage Recurring Payments.” You can manage all of your business’s recurring payments in this section.
Maybe you want to change the frequency of the recurring payment, or perhaps you want to change the customer’s name or billing address. Regardless, you can modify information such as this from the “Manage Recurring Payments” section. Just click the customer’s current name, at which point Quickbooks Desktop will reveal several customizable fields. Go through these fields until you find the information that you want to change. You can then click the “Edit” button to customize the field with new information.
Keep in mind that when you change the terms of a recurring payment, you’ll need to obtain reauthorization from the respective customer. Increasing the amount of a recurring payment, for instance, will require authorization from the customer. Regardless, you can easily change a recurring payment in Quickbooks Desktop. You just need to find the customer in the “Manage Recurring Payments” section and edit the appropriate field or fields. Depending on the type of information that you change, the customer may have to authorize the change.
Did this tutorial work for you? Let us know in the comments section below!
Quickbooks Online and Web Browser Cookies: What You Should Know
 Quickbooks Online has become one of the most popular accounting solutions. It’s a cloud-based software service that you can use to manage your business’s finances. As a cloud-based software service, though, Quickbooks Online uses web browser cookies. It will store certain types of data in these temporary files. To learn more about Quickbooks Online and how it uses web browser cookies, keep reading.
What Are Web Browser Cookies?
Also known simply as cookies, web browser cookies are files that are designed to store data for a specific website or web page. They are typically created automatically. When you visit a website, the site may create one or more cookies while simultaneously sending those files to your web browser. Your web browser will then store the cookie or cookies.
Why Quickbooks Online Uses Web Browser Cookies
According to Intuit, web browser cookies allow Quickbooks Online to run faster. Quickbooks Online is a cloud-based software service. In other words, it’s accessed over the internet. And just like other websites, Quickbooks Online creates web browser cookies. It will store data about your account in these files, allowing for improved usability.
Problems can occur with web browser cookies, however. Normally, you’ll only have to sign in to your Quickbooks Online account a single time. Cookie-related problems, though, may require you to sign in multiple times. After entering your username and password, Quickbooks Online may ask you to sign in again. Alternatively, you may struggle to access specific features in Quickbooks Online if there are problems with your web browser cookies.
How to Fix Cookie-Related Problems
Fortunately, you can easily fix cookie-related problems. Whether you’re forced to sign in to your Quickbooks Online multiple times, or if you’re unable to access specific features, you can delete your web browser cookies to fix problems such as these.
When you delete your web browser cookies, you’ll lose certain types of data related to your Quickbooks Online account. Don’t worry, though. You won’t lose any important data. The data will typically consist of personalization settings as well as your login credentials. You can delete these cookies from your web browser’s settings menu. Different web browsers have different settings menu. Nonetheless, they all allow you to delete cookies. After deleting your web browser cookies, restart your web browser and log back in to Quickbooks Online.
Have anything else that you’d like to add? Let us know in the comments section below!