
How To Set Default Invoice Template In Quickbooks
 If you send invoices to customers and clients on a regular basis, you may want to define a default template. Granted, you can always manually choose a template during each time you create an invoice, but a smarter (and faster) method is to set a default template. Doing so will automatically include your custom template each time you send an invoice, allowing you to focus on other aspects of running and managing your business.
How To Set Default Invoice Template
To set a recently created invoice template as the default template, access Edit > Preferences > Sales & Customers > Company Preferences. In the miscellaneous section, you should see a drop-down list of all your templates. Click the drop-down arrow and choose the template you wish to use as your default packing slip when sending invoices to clients and customers. You can also choose a default pick list under the Sales & Order section. Don’t worry, you can always go back and change this later if you prefer.
Why Won’t My Invoice Template Save as Default?
Intuit notes that some users may not be able to set a default invoice template in their account. If you are experiencing difficulty setting a default invoice, you should first attempt to resort your invoice templates. This is done by choosing List > Templates > View > Re-sort list > and clicking OK. After resorting your templates, go and create a new “test” template under Customers > Create Template. Assuming it works, your new test template will automatically be set to default. Quickbooks normally sets your most recently created template as the default template. Of course, you can follow the steps mentioned above to choose any template as your default template, including old ones.
If resorting did not solve the problem, try testing a different invoice template. Go to Customers > Create Template and create a new test invoice with the standard template. Rather than choosing a custom template, however, it’s recommended that you choose one marked with “Intuit.” Enter the customer and item details on the invoice and click Save & Close.
The key thing to remember is that Quickbooks normally sets your most recently created invoice template as default. If you wish to choose a different default template, however, you can follow the steps mentioned above.
Did these steps work for you? Let us know in the comments section below!
China To Invest In Cloud Computing Technology
 We’ve talked about the boom of cloud computing before on our blog, but it was usually in the context of U.S.-based firms who’ve since embraced the technology. Now, it appears that China is stepping up its efforts to leverage the power of cloud computing.
According to a report published by the Chinese media agency China Times, China will invest an unknown sum to develop an industry chain of cloud computing systems. The project, which is being led by the National Development and Reform Commission (NDRC), will begin in 2016 and is expected to be complete by 2020.
But this isn’t only one step in a larger, broader goal of creating a cloud-based networked system in China. Chen Wei of the country’s Ministry of Industry and Information Technology said China is currently working on its 13th 5-year cloud-computing project.
So, how does China plan to build such a massive cloud-based system? Reports suggest that it will fund leading tech companies, encouraging them to further develop and expand their cloud computing technologies. By funding leading tech companies, China hopes to create a more dynamic and streamlined system of cloud computing technology.
Cloud computing has become a hot topic as of late, with both governments and private companies bolstering their efforts to utilize this efficient system. There are several key advantages to using cloud computing, including less maintenance, reduced startup costs, greater efficiency of resource usage, and ease of expansion. Of course, these are just a few of the many reasons why so many organizations are investing heavily into cloud computing.
A recent U.S.-China Economic and Security Review Commission report suggests that China is developing cloud technology for three main purposes: to expand its military capabilities, to provide greater IT resources to consumers, and to create an internationally competitive service industry.
“In recent years the Chinese government has prioritized the development of cloud computing technology with the twin goals of expanding Chinese military and civilian access to cloud computing information technology (IT) resources and creating an internationally competitive Chinese cloud computing service industry. As part of a larger development strategy for advancing Chinese software and information technology services, the Chinese government plans to make more than one billion dollars (USD) available over the next few years to drive cloud computing development,” stated the U.S.-China Economic and Security Review Commission report.
What are your thoughts on China’s plan to develop greater cloud based systems? Let us know in the comments section below!
How To Add a Credit Memo
 The credit memo is used in the event that a customer or client returns items that you’ve already recorded. Failure to set up a credit memo could result in the item being recorded twice; thus, throwing off your entire balance. Intuit acknowledges this potential problem and offers users a quick and easy solution through the use of credit memos.
To set up a credit memo, choose Create Create Memos/Refund under the Customers menu from within the main Quickbooks portal area. Scroll down to the Customer/Job field and choose the appropriate customer and job for which you are issuing the memo/refund. If the customer has multiple jobs, double-check to make sure the memo is attached to job for which you want to issue a refund.
Next, choose a template for your memo under the Lists menu. Once you click the drop-down menu, you’ll see a list of available templates from which to choose. Select the desired one and proceed to the next step.
You will now need to specify the Accounts Receivable to use with the memo. Click the Account drop-down button and choose the appropriate account. In the line item, enter the item (or items) being returned by the customer/client. It’s recommended that you use the exact same billing information as displayed on the original billing statement or invoice.
Quickbooks also allows users to specify a class with credit memos. This step is completely optional, but doing so will allow you to track your transactions with greater ease. If you run a business with multiple branches, for instance, you may want to set up a unique class for each branch. And assuming one of these branches requires the use of a credit memo, you can use a class to connect the memo with the appropriate branch.
Another optional step in creating a credit memo is adding a customer message. If you want to include a message to the customer or client, select a previously used message from the drop-down box or create a new one from scratch.
When you are finished setting up the credit memo, click Save to complete the process. Upon clicking Save, a new window will appear asking you how you wish to use the credit memo. Choose one of the three following options:
- Retain as an available credit
- Give a refund
- Apply to an invoice
Intuit Study Reveals The Future of Cloud Computing
 The use of cloud computing by small businesses is on the rise, and according to a new study conducted by Emergent Research and Intuit Inc., this trend will continue in the years to come.
Within the next six years, the use of cloud computing will more than double. The study says that nearly 80% of small businesses in the U.S. will embrace cloud technology by 2020, up from its current rate of just 37%.
“This report paints a detailed picture of how small businesses will increasingly use cloud technology not only for efficiency gains, but also in more transformative ways that redefine the rules for achieving long-term success,” said Terry Hicks, vice president and general manager, QuickBooks Online Ecosystem at Intuit.
“Whether you’re a tech startup in Silicon Valley or a mom-and-pop shop on Main Street, cloud technology presents radically new opportunities, and potentially disruptive changes. This report is all about developing a deep understanding of how small business can stay ahead of the curve,” he added.
Why are so many businesses opting to use cloud technology? We discuss the benefits of cloud computing in a previous blog post, but the fact is that it’s a cheaper and more efficient system of computing. Rather than setting up independent computing terminals in each worker’s office, businesses can use cloud computing to allocate computing resources where they are needed most. If one worker is performing resource-intensive operations, he or she will receive more resources than a worker who is not performing these operations. Cloud computing is built on a simple yet effective principle where resources are only given to those who need it, which subsequently cuts down on operating costs.
Intuit and Emergent Research predict more and more small businesses will use cloud computing to perform specialized services, such as customer relations management (CRM), accounting, employee payroll, marketing, and more. Within the next 6 years, we’ll see a shift from the use of centralized dedicated services to cloud-based technology for these services, says the study.
The report also predicts that small businesses will use cloud computing to compete “head to head” with major firms. Cloud computing allows these small businesses to use services and tools that were once limited to large companies. Using these new tools, small businesses can gain the upper hand on major firms, potentially even dethroning them of their position as a leading authority figure in their respective niche/industry.
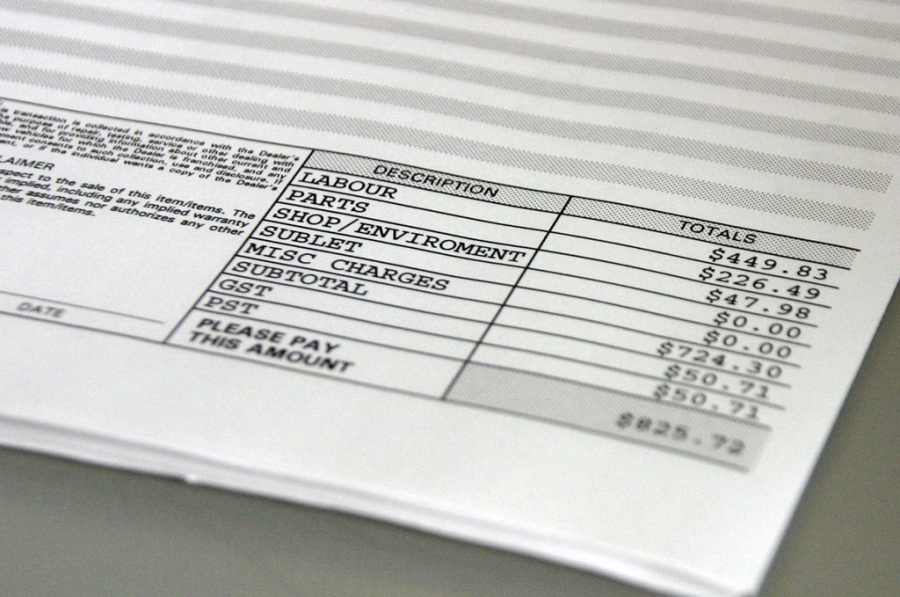
How To Apply a Sales Discount In Quickbooks
 It’s not uncommon for small businesses and retailers to offer sales discounts to their customers. While you can always reduce the initial invoice to reflect a promotional sale, this doesn’t have the same impact as seeing the cost-difference. For instance, sending a customer an invoice for “
$200.00 $129.99″ looks better than an invoice for “$129.99.” By including the original and the sale price in your invoice, customers will feel like they receiving a better deal.
To apply a sales discount on an invoice or order form, you must first create a special discount item and then enter it on the form. Click on the Lists menu followed by Item List. Next, click Item and then New. You should then see several drop-down boxes. Click the one labeled Item and choose a name for your discounted item, such as Product A Discounted at 30%.
Now, you will need to enter a description for your discounted item. Think long and hard about your description, because this will be displayed on your sales form.
In the amount field, enter the amount of the discount. This can be done either with a percentage or dollar figure. If you want to offer customers a 30% discount, for example, enter “30%” in the discount amount field. On the other hand, if you want to offer customers a flat discount of $50, enter $50. You can also choose to leave this field blank if you plan to enter custom discounts on the actual sales form. Leaving the field blank will allow you to enter different discount amounts in different sales forms.
After choosing the amount of your discount (or leaving the field blank), click the drop-down box labeled Account and select the income amount for tracking customer discounts. Last but not least, click the drop-down box for Tax Code to choose a taxable code for your discount. This basically sets up the sales form to apply sales tax before the discount is applied — a measure required by some states.
Hopefully, this guide will give you a better understanding of how to apply a discount to one or more sales forms in Quickbooks. By using sales and promotions, you’ll retain more of your existing customers/clients while subsequently attracting new ones. It’s an otherwise simple tactic that can make a world of difference in your normal business operations.
To view a video tutorial for the process above please visit the following link: https://www.youtube.com/watch?v=8lzWp6KeJpQ
The Five Essential Characteristics of Cloud Computing
 Still trying to grasp the concept of cloud computing? Even with its growing popularity and widespread use, few people actually understand what the cloud is and how it operates.
To make things a little bit easier, the National Institute of Standards and Technology (NIST) released a set of five essential characteristics of cloud computing back in 2011. Granted, these standards are now over three years old, but they remain relevant and accurate today. This week, we’re going to reveal the essential characteristics of cloud computing as defined by the NIST.
#1) On Demand Self Service — The consumer can perform computing processes without requiring interaction with each service provider.
#2) Broad Network Access — Access to the cloud can be achieved using a multitude of different devices, such as PCs, smartphones, tablet computers, etc.
#3) Resource Pooling — The cloud’s computing resources are pooled to allow for greater efficiency. In other words, clients that use minimal computing power will require less system resources than clients who use large amounts of computing power.
#4) Rapid Elasticity — The cloud can be easily scaled as the number of connected clients increase. Clouds typically grow in size, which is why it’s important for the the system to allow for expansion and scalability.
#5) Measured Service — Ability to measure the cloud’s performance in some way, shape or form (bandwidth, processing, etc.)
“Cloud computing is a model for enabling ubiquitous, convenient, on-demand network access to a shared pool of configurable computing resources (e.g., networks, servers, storage, applications, and services) that can be rapidly provisioned and released with minimal management effort or service provider interaction. This cloud model is composed of five essential characteristics, three service models, and four deployment models,” wrote the NIST in its document detailing the five essential characteristics of cloud computing.
Familiarizing yourself with the five essential characteristics of cloud computing should give you a better understanding of this setup and how it operates. a Cloud is basically a network in which clients access shared resources from a center hub. The cloud is designed in a manner that allows clients to access it from an array of different devices.
There are numerous benefits associated with cloud computing, which you can read more about in previous posts here at the MyVao.com blog, but one of the most notable is efficiency. With resources being pooled, computing power only goes to clients who need it.
What are your thoughts on cloud computing?
Intuit Launches ‘Quickbooks Bitcoin Payments’

Last month, Intuit announced the addition of a new payment method to its payment processing service. But this isn’t a traditional method of payment such as credit cards, debit cards, bank transfers, etc.; it’s the digital currency Bitcoin. Bitcoin has experienced a surge in popularity, as major online retailers like Tiger Direct and Overstock are now accepting it. News of Intuit’s “Quickbooks Bitcoin Payments” is just one more sign that the currency is here to stay.
In case this is your first time hearing about Bitcoin, let me give you a quick crash course on the currency. Originally created in 2009, it’s a decentralized digital currency with no banks or regulatory systems serving as the “middle man.” This unique formula has made it an attractive payment method for both merchants and clients alike.
Using Quickbooks Bitcoin Payments, small businesses can accept this revolutionary new currency with ease. Normally, both the merchant and the client/customer would need a Bitcoin Wallet to perform a transaction. However, with Quickboosk Bitcoin Payments, only the client needs a Wallet. In fact, merchants using the service will never see a wallet or Bitcoin when accepting payments of the digital currency.
“During incubation week, we experimented with bitcoin to solve the aforementioned pains associated with getting paid. We came up with an innovative way to enable small businesses to accept bitcoin payments without any risk or a bitcoin wallet. We’re still testing our bitcoin service. Stay tuned for more details! Sign up for the beta waiting list here,” wrote Intuit on its website.
Some of the benefits of accepting Bitcoin payments includes the following:
- No chargebacks
- Instant transactions between merchant and client
- Safe and secure method of payment
- Easier and safer to hold Bitcoins as opposed to cash
- No credit card transaction fees
- Protects both parties’ identities
- Being that there are a finite amount of Bitcoins, proponents of the system claim its protected against inflation
Is Bitcoin right for your business? There are both advantages and disadvantages to this new digital currency. While it’s typically cheaper to accept Bitcoin than other forms of payment, it’s more susceptible to price volatility. Bitcoin prices change on a regular basis, shifting by massive amounts in short periods of time. Granted, traditional currency may also experience value changes, but Bitcoin is more susceptible to market volatility.
You can learn more about Quickbooks Bitcoin Payments by visiting Intuit’s official website at http://intuitlabs.com/labexperiments/quickbooks-bitcoin-payments.
How To Void an Invoice
 Did you accidentally send a client the wrong invoice? Quickbooks allows users to either delete or void invoices. Deleting it will permanently erase it, preventing you or anyone from else from accessing it in the future. Voiding an invoice, on the other hand, will preserve it in an archive format so you still see and access it. If you believe the latter is the best course of action, keep reading for a step-by-step tutorial on how to void an invoice.
Locate The Invoice
First and foremost, you must find the invoice you wish to void. If you already know the client/customer’s name, access the Customers & Jobs list and choose the respective customer. This should reveal a transactions list to the right, where you can select all transactions and invoices associated with the client.
In the event that you do not know the client’s name, you can search through all of your invoices — or those within a certain time period — by accessing the Transactions tab, followed by Invoices. Click the drop-down arrow next to the invoices box to refine your search based on a specific time period. If you know when the invoice was sent out, for instance, you should choose this time period to narrow your results down.
Void It
Once you’ve found the invoice, go ahead and open it in Quickbooks. From the main menu, select Edit > Void Invoice. Sorry if you were expecting more, but that’s all it takes to void an invoice in Quickbooks! Upon clicking the “Void Invoice” button, it will no longer affect your account, nor will the client be required to pay it.
How To Delete an Invoice
Of course, there may be times when deleting an invoice is the best option. If you accidentally sent out an erroneous invoice, for instance, you probably don’t want it in your archives; therefore, deleting would prove to be the better of the two options. Deleting is permanent, however, so double-check to make sure you are editing the correct invoice before proceeding.
To delete an invoice in Quickbooks, locate the invoice using the method previously mentioned. After identifying and opening the invoice, choose Edit > Delete Invoice from the main menu. Quickbooks will ask you to confirm the changes, at which point you should verify by clicking OK.
Did these steps work for you? Let us know in the comments section below!