

What Are Categories in Quickbooks and How Do They Work?
 Keeping track of all your business’s products can be difficult. Depending on the type of business you own and operate, it may offer hundreds or even thousands of products. As a result, sifting through them all can be tedious and tiresome. Fortunately, Quickbooks supports the use of categories to group similar products — as well as services, if applicable — together. By using categories, you’ll have an easier time tracking your business’s inventory and analyzing your business’s sales revenue.
Overview of Categories
Categories are a feature in Quickbooks that allows you to group similar products together. It’s not a requirement for using the popular accounting software. On the contrary, if your business sells a single product, there’s no need to use them. Nonetheless, businesses that sell many different types of products can benefit from the use of categories. With categories, you can organize your business’s categories so that they are easier to evaluate and analyze.
How to Create a Category
You can create a category in Quickbooks by logging in to your account and clicking the “Sales” menu, followed by “Products and Services.” Next, click the “More” drop-down menu and choose “Manage Categories.” You should then see an option for “New category.” Clicking this link will allow you to create a new category with a custom name.
Because categories are used for grouping and organization purposes, you should give the new category a relevant name. If you’re creating a category for a specific store, for example, you may want to give it the same name as the respective store. Using a relevant name will help you identify the category more easily.
How to Create a Subcategory
You can also create lower-level categories under a top-level or “parent” category. Known as a subcategory, it’s supported by Quickbooks. To create a subcategory, pull up the main parent category by following the steps listed above. When you click “New category,” Quickbooks will ask you if it’s a subcategory. Clicking the box will place a checkmark that confirms the new category is, in fact, a subcategory.
Whether it’s a category or subcategory, you can add it to your business’s products. This is done by pulling up the product or service in Quickbooks and then clicking the “Edit” tab from the “Action” drop-down menu. When you click the “Category” menu, you’ll see a list of all your previously categories and subcategories, which you choose to organize the product.
Have anything else that you’d like to add? Let us know in the comments section below!

How to Create a Packing Slip in Quickbooks
 Does your business ship products to its customers? Not all transactions are performed in person. While some businesses only sell their products locally and in person, others allow customers to order products online. In the latter scenario, you’ll typically need to create a packing slip for each order. Fortunately, Quickbooks features a simple tool for creating packing slips. For a step-by-step walkthrough on how to create a packing slip in Quickbooks, keep reading.
What Is a Packing Slip?
A packing slip is a piece of printed paper that contains information about a customer’s order. When you ship an order to a customer, you should include a packing slip in the box. The packing slip will reveal the type of products purchased, the number of units purchased, the price of the products, the customer’s address and other essential information about the customer’s order.
Steps to Create a Packing Slip
You can create a packing slip in Quickbooks by performing just a few simple steps. In Quickbooks Online, log in to your account and click the “Sales” tab under the main menu, followed by “Customers.” After finding and clicking the name of the customer for whom you are creating a packing slip, check the “Transaction List” tab for the invoice. The invoice should contain all of the information needed to create a packing slip. Once you’ve found the invoice, click the drop-down menu labeled “Batch actions” and select “Print packing slip.”
Quickbooks will then display a preview of the packing slip. In this preview, you’ll be able to see what the packing slip looks like before it’s printed. You can also make changes to the packing slip before printing it. Assuming the packing slip looks okay, you can proceed to print it. When you prepare the customer’s order for shipping, you can place the packing slip in the same box with his or her purchased products.
In Conclusion
Packing slips are important because they contain information about customers’ orders. Customers don’t always remember what they ordered. With a packing slip, though, they’ll have all the essential information on a piece of printed paper.
Quickbooks supports the creation of packing slips. If you use Quickbooks to create invoices, you can use the accounting software to create and print packing slips. Just find the invoice and selec “Batch actions,” followed by “Print packing slip.”
Did this tutorial work for you? Let us know in the comments section below!

ACH vs Wire Transfer: What’s the Difference?
 There are several payment technologies that you can use to transfer money between two bank accounts, the two most common being automated clearing houses (ACHs) and wire transfers. They are both used extensively by banks throughout the United States. Whether you need to send or receive money, you can use an ACH or wire transfer. With that said ACHs and wire transfers aren’t the same. They work in different ways and have their own unique benefits. To learn more about the differences between ACHs and wire transfers, keep reading.
What Is an ACH?
An ACH is a type of bank-to-bank transfer that’s facilitated by the automated clearing house network. It’s also known as a direct deposit. During an ACH transfer, the payor’s bank sends a request to the recipient’s bank. Once grated, the payment is routed through the ACH network before landing in the recipient’s account.
It’s important to note that not all banks support ACH transfers. While most banks support wire transfers, only some of them support ACH transfers. Therefore, you’ll need to check beforehand to determine whether your bank account the other bank account supports ACH transfers. If either of the banks don’t support it, you’ll have to use an alternative solution, such as a wire transfer.
What Is a Wire Transfer?
A wire transfer is a type of bank-to-bank transfer that bypasses the automated clearing house network. Instead of using the automated clearing house network, it uses the payor’s and recipient’s routing numbers and account numbers.
Wire transfers are more common. Since they don’t go through the automated clearing house network, they are supported by more banks. A bank doesn’t have to participate in the automated clearing house network to support wire transfers.
Which Is Best?
Both ACH and wire transfers offer their own benefits. Wire transfers, for instance, are supported by more banks. Even if a bank doesn’t offer ACH transfers, it probably offers wire transfers.
Wire transfers are also faster. Most banks can process a wire transfer in just 24 hours. In comparison, it may take them several days to complete an ACH transfer.
On the other hand, ACH transfers typically cost less than wire transfers. Many banks offer ACH transfers at no additional charge. You can send or receive money for free using an ACH transfer. In comparison, banks often charge between $20 to $40 per wire transfer.
Have anything else that you’d like to add? Let us know in the comments section below!

How to Add a Memorized Transaction to a Group in Quickbooks
 Quickbooks offers several tools that allow you to quickly create invoices for your business’s customers, one of which is the memorized transaction feature. A memorized transaction is essentially a template that you can apply to one or more transactions. Rather than creating a new transaction from scratch, you can use a memorized transaction. If you use memorized transactions, though, you may want to categorize them in groups. You can create different groups for your memorized transactions, allowing you to find them more easily.
Create a New Group
Before you can add a memorized transaction to a group, you’ll need to create the group. In Quickbooks Desktop, you can create a new group by accessing the “Lists” menu, followed by the “Memorized Transaction List.” From here, click the drop-down menu for “Memorized Transaction” and choose “New Group.” You can then enter the information about the group, such as its name, how often you’d like to receive reminders about it, the next date and more. When finished, click “OK” to save and complete the process.
Add a Memorized Transaction
With the new group created, you can now add a memorized transaction to it. This is done by selecting the “Lists” menu once again and choosing the “Memorized Transaction List.” You should now see your memorized transaction under this menu. Upon locating the group, right-click it and choose “Edit Memorized Transaction.” Next, click “Add to Group,” after which you can select the name of the group to which you want to add the memorized transaction. After making sure it’s the correct group, click “OK.”
How to Edit a Memorized Transaction
By following the two simple steps listed above, you can quickly add a memorized transaction to a group. Of course, there are times in which you may want to edit a memorized transaction. You can always delete a memorized transaction and replace it with a new memorized transaction. Doing so, however, can be time-consuming, especially if you need to modify several memorized transactions. An alternative solution is to edit the memorized transaction.
You can edit memorized transactions in Quickbooks Desktop by accessing the “Lists” menu, followed “Memorized Transaction List.” After double-clicking the memorized transaction that you want to edit, you’ll see a box with several fields that you can edit. Just modify the fields, after which you can click “OK” to complete the process.
Did this tutorial work for you? Let us know in the comments section below!

What Is Liquidity in Business Accounting?
 Have you come across the term “liquidity” when researching accounting activities? If so, you might be wondering what it means. No matter what type of business you operate, it probably has at least some liquidity. All businesses, including business-to-consumer (B2C) and business-to-business (B2B), have liquidity. With that, some have greater liquidity than others. So, what is liquidity, and how does it related to your business’s activities?
Overview of Liquidity
Liquidity is a measurement of how fast your business can convert its assets into cash. Whether you realize it or not, your business probably has assets that can be converted into cash. Examples of common assets owned by businesses include stocks, real estate, inventory, equipment and patents. Not all assets can be converted into cash immediately, though. You’ll typically need to sell them to generate cash. The time it takes to convert assets into cash is described as liquidity.
The Importance of Liquidity
Liquidity is important because it can help your business cover liabilities. Your business will inevitably incur debt when executing its respective operations. According to Fundera, in fact, seven in 10 small businesses have outstanding debt that haven’t paid back. Allowing debt to go unchecked, of course, can cut into your business’s profit margins. Lenders and vendors often charge interest on outstanding debt. The longer a debt goes unpaid, the more interest you’ll have to pay on it. If your business has excellent liquidity, you can use the cash generated from the sale of assets to pay off some or all of your business’s debt.
How to Improve Your Business’s Liquidity
Even if your business has poor liquidity, there are steps you can take to improve it. Reducing overhead, for example, will naturally have a positive impact on your business’s liquidity. Overhead consists of ongoing expenses that aren’t directly related to your business’s money-making activities. While you can’t always eliminate all overhead expenses, you can often reduce them. Canceling unnecessary services and changing utility companies can reduce your business’s overhead and, therefore, improve its liquidity.
If your business uses invoices, you can improve its liquidity by collecting from delinquent customers or clients. Customers and clients don’t always pay invoices on time. They may allow invoices to go unpaid longer after the due date. By collecting payments from these customers or clients, your business’s liquidity will increase.
Have anything else that you’d like to add? Let us know in the comments section below!
How to Record an Owner’s Reimbursement in Quickbooks
 Have you used your own money to cover one or more business-related expenses? You aren’t alone. Countless business owners tap into their personal funds. When using your personal funds for business-related expenses, though, you’ll typically need to record the transactions as an owner’s reimbursement.
Once you’ve used your own money to pay for a business-related expense, you should reimburse yourself for the transaction. Reimbursement means transferring money from your business’s bank account to one of your own personal bank accounts. Of course, you’ll need to then record the reimbursement in your Quickbooks account. Doing so will ensure that your Quickbooks account recognizes the reimbursement. You can record an owner’s reimbursement in just a few simple steps.
Create a Journal Entry
To get started, you’ll need to create a journal entry for the transaction. In Quickbooks Online, you can create new journal entries by clicking the (+) sign at the top of the page and choosing “Journal Entry.” From here, enter an expense account, after which you can debit the total amount of the transaction in the first field. You can then choose “Owner’s Equity,” followed by entering the same amount from the previous field. When finished, click “Save and close” to finish the journal entry.
Record the Reimbursement
After creating a journal entry, you can now record the reimbursement. This is done by clicking the (+) sign once more and selecting “Expense.” You should now see an option to select your bank account. For this option, choose the bank account from which you were reimbursed for the transaction. When you reimburse yourself for a business-related expense, you’ll use a bank account that’s connected to your business. You should choose this bank account when recorded an owner’s reimbursement.
Upon selecting “Expense” and choosing your bank account, you’ll need to choose “Owner’s Equity.” Next, enter the amount of the transaction. You can complete the process by selecting “Save and close.” The owner’s reimbursement should now be recorded in your Quickbooks account.
In Conclusion
An owner’s reimbursement is a transaction between your business bank account and your own personal bank account. When you use money from your personal bank account to pay for a business-related expense, you should reimburse yourself. This involves transferring money from your business’s bank account back into your personal bank account. If you use Quickbooks, you can record owner’s reimbursements such as this using the steps listed above.
Did this tutorial work for you? Let us know in the comments section below!

Need to Write Off Bad Debt? Here’s How You Do It
 Bad debt is a common occurrence when running a business. If your business allows customers or clients to pay after their products have been delivered or their services have been completed, some of them may not pay. While you can’t force a customer or client to pay, you can write off the transaction as bad debt. Doing so will essentially lower your business’s taxable income, meaning you won’t have to pay taxes on the transaction. In Quickbooks, you can write off bad debt such as this by closing out the client’s or customer’s invoice.
Create an Expense Account
Before closing out the client’s or customer’s invoice, you should create an expense account. Creating an expense account allows you to track the bad debt. You can create an expense account in Quickbooks Desktop by accessing the “Lists” menu, followed by “Chart of Accounts.” Next, click the “Account” menu and choose “New.” From here, you can click “Expense,” followed by “Continue” to begin setting up the expense account. You’ll need to enter a name for the expense account, such as “Bad Debt,” after which you can click “Save and Close” to complete the process. When finished, you’ll have a new expense account to track the bad debt.
Close the Invoice
After creating an expense account, you can keep an eye on the bad debt to determine whether or not it’s paid. Assuming the customer or client doesn’t pay it, you should proceed to close out the invoice. Bad debt, of course, occurs when a customer or client doesn’t pay his or her invoice. You should always give them extra time to pay, but if the invoice has an outstanding balance that’s several months late, it’s probably time to close it out.
You can close out unpaid invoices associated with bad debt by accessing the “Customers” menu and choosing “Review Payments.” Next, enter the name of the customer or client to whom you sent the invoice in the “Received from” field. You’ll then need to enter $0.00 for the “Payment amount” field. Next, choose the option for “Discounts and credits.” You can then enter the total amount of the invoice in the “Amount of Discount” field.” To complete the process, select the “Save and Close” option. This will essentially write off the customer’s or client’s invoice as bad debt.
Did this tutorial work for you? Let us know in the comments section below!
How to Create a PDF Copy of Your Account Balances in Quickbooks
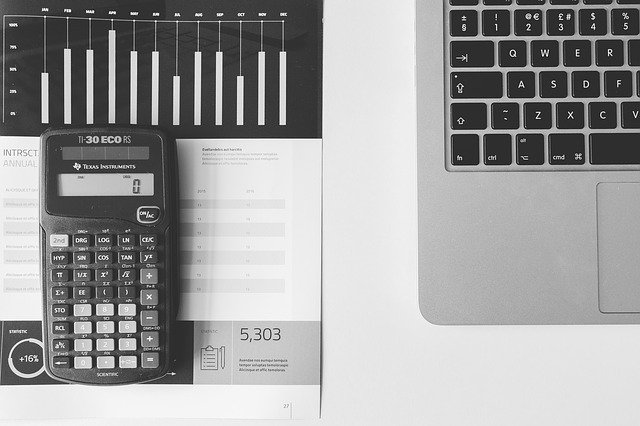
![]() Account balances are essential financial information that you’ll need to record when running a business. No matter what type of business you operate, you’ll probably have income and expenses. Income is money earned by your business, whereas expenses are money paid by your business. Because account balances play such a critical role in accounting, though, it’s a good idea to create a backup of them. If you use Quickbooks, you can easily create a PDF copy of your account balances in just a few simple steps.
Account balances are essential financial information that you’ll need to record when running a business. No matter what type of business you operate, you’ll probably have income and expenses. Income is money earned by your business, whereas expenses are money paid by your business. Because account balances play such a critical role in accounting, though, it’s a good idea to create a backup of them. If you use Quickbooks, you can easily create a PDF copy of your account balances in just a few simple steps.
Steps to Create a PDF Copy of Account Balances
When using Quickbooks Desktop, you can create a PDF copy of your account balances by logging in to your account and clicking the “Reports” menu. From the “Reports” menu, you’ll see three different options: “Account balances,” “Customer balances” and “Vendor balances.” You can select any of these three options to create a PDF copy of the respective account balances.
If you want to create a PDF copy of your account balances,” click the “Account balances” option under the “Reports” menu and select “Company & Financial,” followed by “Balance Sheet Detail.” To create a PDF copy of your customer balances,” click “Customers & Receives,” followed by “Customer Balance Detail.” To create a PDF copy of your vendor balances,” click “Vendors & Payables, ” followed by “Vendor Balance Detail.”
After selecting your desired type of account, click the “Print” icon. Don’t worry, although this option allows you to print your account balances, you can also use it to create a PDF copy. If you want to print the account balances, you can select the “Print.” option, in which case the printer connected to your computer will create a paper document of the selected account balances. You can create a PDF copy of the account balances, however, by choosing “Save as PDF” instead.
Keep in mind that you’ll need a special program to view PDF files. Neither Microsoft Word nor any other standard text editor is capable of opening them. The good news is that there are several free-to-download PDF programs, the most popular of which is Adobe Acrobat Reader. Alternatively, there are PDF reader extensions that you can add to your web browser. Chrome and Firefox both support the use of PDF reader extensions. Regardless, you’ll need a program to open and view your account balance copies after saving them as a PDF.
Did this tutorial work for you? Let us know in the comments section below!